


Turbine Conversion Of Freewing 90mm Eurofighter
 06-16-2023, 04:18 PM
#76

Thread Starter
My Feedback: (20)
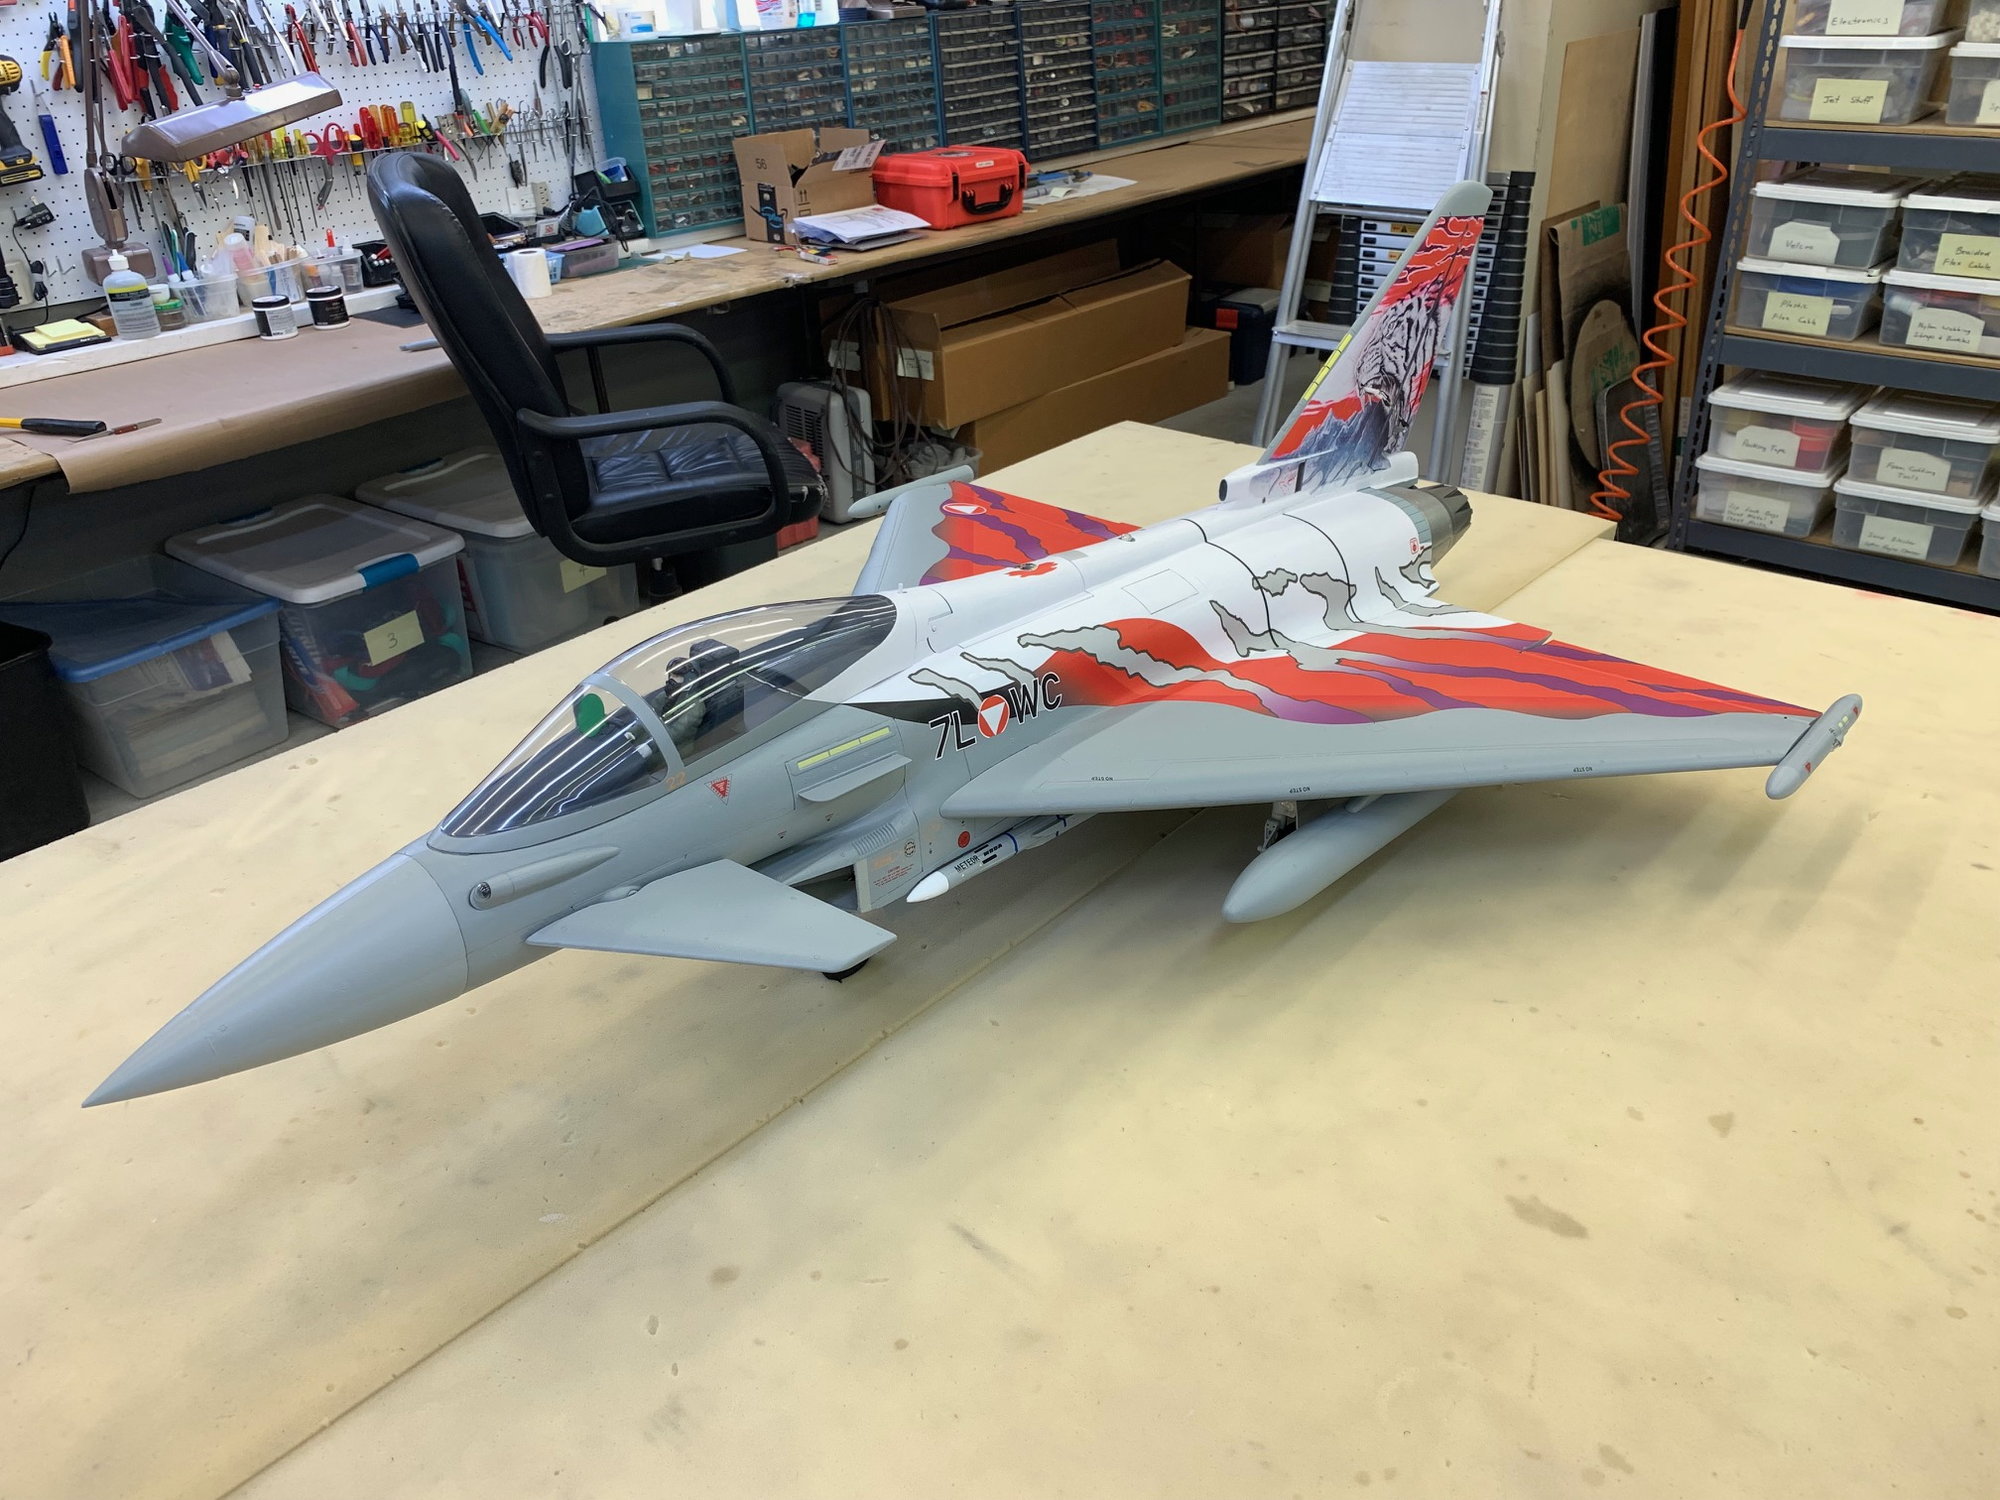
Austrian Tiger Scheme Finished!

I got the last of the decals on the tail and fin and added turbine wheel lines to fuse. The back line is supposed to be red but I didn't have red so it is black. The whole jet was given 2 coats of flat Polycrylic to take the sheen off the vinyl and give everything the same finish. Anyway its all done and ready to fly again.


I got the last of the decals on the tail and fin and added turbine wheel lines to fuse. The back line is supposed to be red but I didn't have red so it is black. The whole jet was given 2 coats of flat Polycrylic to take the sheen off the vinyl and give everything the same finish. Anyway its all done and ready to fly again.

The following users liked this post:
Afterburners (06-20-2023)
06-16-2023, 04:27 PM
#77
Thread Starter
My Feedback: (20)
Gary
06-20-2023, 06:21 AM
#78
Not gonna happen here. I believe they do their proximity flight training somewhere in the american desert actually. Where I live (most western part of austria) they can't fly at all because they'd get into swiss and/or italian airspace just by trying to turn around. 
Your Tiger theme looks absolutely fantastic though. Great job!
Your Tiger theme looks absolutely fantastic though. Great job!
07-12-2023, 03:02 AM
#81
Thread Starter
My Feedback: (20)
Feel free to post photos of your Eurofighter conversion and share your progress here. We look forward to seeing your conversion, ideas, and techniques.
Thanks,
Gary
Last edited by Viper1GJ; 07-12-2023 at 03:05 AM.
The following users liked this post:
Mich@el (07-12-2023)
07-15-2023, 04:23 PM
#82
Thread Starter
My Feedback: (20)
Bad news at field today...

This taken just a minute before starting. The X-45 started normally and accelerated to about 35K rpm and 410 degrees and then the turbine just froze up. Flames came out the tail and would not stop. For the first time in 23 years I shot my fire extinguisher down the intake of my own jet and the flames went out. This is the first issue I've had with the X-45s other than the starter O-ring. AARRGGHH!

Back at the shop I had to cut the hatch open because it was melted to the fuse.

All damage is internal and can be repaired.

There was no heat damage to the exterior of the jet. I'll just park it for a while till I get motivated again.
This taken just a minute before starting. The X-45 started normally and accelerated to about 35K rpm and 410 degrees and then the turbine just froze up. Flames came out the tail and would not stop. For the first time in 23 years I shot my fire extinguisher down the intake of my own jet and the flames went out. This is the first issue I've had with the X-45s other than the starter O-ring. AARRGGHH!
Back at the shop I had to cut the hatch open because it was melted to the fuse.
All damage is internal and can be repaired.
There was no heat damage to the exterior of the jet. I'll just park it for a while till I get motivated again.
07-15-2023, 10:30 PM
#83
Gary, that is bad luck mate! Looks like the 3d printed intake cone didn't like the heat at all, just wondering if a aluminum one would be better? If the engine is OK, I would mount it on a test stand and run it up, possibly fuel on the O ring and slipping, but it shouldn't have allowed fuel in if the RPM was not correct.
07-16-2023, 06:03 PM
#84
Thread Starter
My Feedback: (20)
Gary, that is bad luck mate! Looks like the 3d printed intake cone didn't like the heat at all, just wondering if a aluminum one would be better? If the engine is OK, I would mount it on a test stand and run it up, possibly fuel on the O ring and slipping, but it shouldn't have allowed fuel in if the RPM was not correct.
Gary
07-16-2023, 11:22 PM
#85
Yes, bad luck for sure. I've been using the 3D printed cones for a couple of years with no problems, not even a burn mark as long as the turbine works normally. Once the fire started I wouldn't expect it to not melt. Problem is what caused the start sequence to just stop and go to zero RPM suddenly. I think when the wheel stopped turning suddenly when ramping up there was enough fuel already in the the can to start the fire on the cone with no air flow out the pipe. I will put it on a test stand tomorrow and see what happens. Replacing the cone cost me nothing except a couple of hours but I really need to figure out what happened first. At least there was no burn thru the fuse skin so no major damage to the airframe.
Gary
Gary
07-17-2023, 03:39 PM
#86
Thread Starter
My Feedback: (20)
Start and run on test stand.

This photo shows turbine running at idle on the third test run after correction made to the fuel line.
I think I found the problem. I took the turbine out and mounted it on test stand. I extended the fuel line to the turbine using a Festo coupler. I ran the power cable from the jet to the turbine and used the battery, tanks, and pump inside the jet to do the runs.
The first two starts were slower than normal and took extra time to ramp to idle but it did start and run. There was no flame or failed starts. However after that I noticed a puddle of fuel under the jet where the turbine fuel line was attached to the extension coupler to the test stand. (You can see the fuel stain under the nose in the above photo. It was actually under the tail when it happened. I turned the jet around to have clean paper for the last runs after fixing the fuel tubing.) I pulled the coupler off and found the tubing inside the jet had a crimp ring around the end where the Festo seal would hold it. I cut off the crimped end and reseated the tubing in the Festo coupler. The next three starts and runs were flawless with extended run ups at full power and back to idle each time. Not a hint of a problem.
My theory is that some how, either the crimped tubing or not fully seated fuel connection to the turbine, allowed fuel to leak out of the connection and puddle inside the jet. I don't know why because nothing inside was touched since the last flights before the new paint job. Either low fuel flow or low fuel pressure caused the ECU to feed more than normal fuel into the start and ramp, which caused either the turbine to freeze up, or ECU to shut it off during ramp with excess fuel in the flame holder which came out and ignited the leaked fuel. This caused the internal fire with the turbine stopped. There were no flames shooting out the back like a hot start, just a orange colored flame slowing coming out the center pipe and also out the foam scale nozzles on each side. This was blown out by the fire extinguisher. I'm very surprised there was not more damage to the tail and fake nozzles. I ran this theory by two buddies and both said it seemed possible.
At this time I can see no reason to put the turbine back inside the jet once internal repairs are made. This time I will make sure the fuel tube does not have a crimp ring at the end and is fully seated. I'll do the first starts with the hatch open to check for any drips or leaks.
Last edited by Viper1GJ; 07-17-2023 at 03:55 PM.


The following users liked this post:
Viper1GJ (07-18-2023)
07-22-2023, 02:16 PM
#88
Thread Starter
My Feedback: (20)
Fire damaged repaired and test runs complete
I had to cut off about 5mm of the stinger below the rudder. The fire ate it up pretty bad.

After I cut it I covered the rear end with BVM heat shield and repainted.
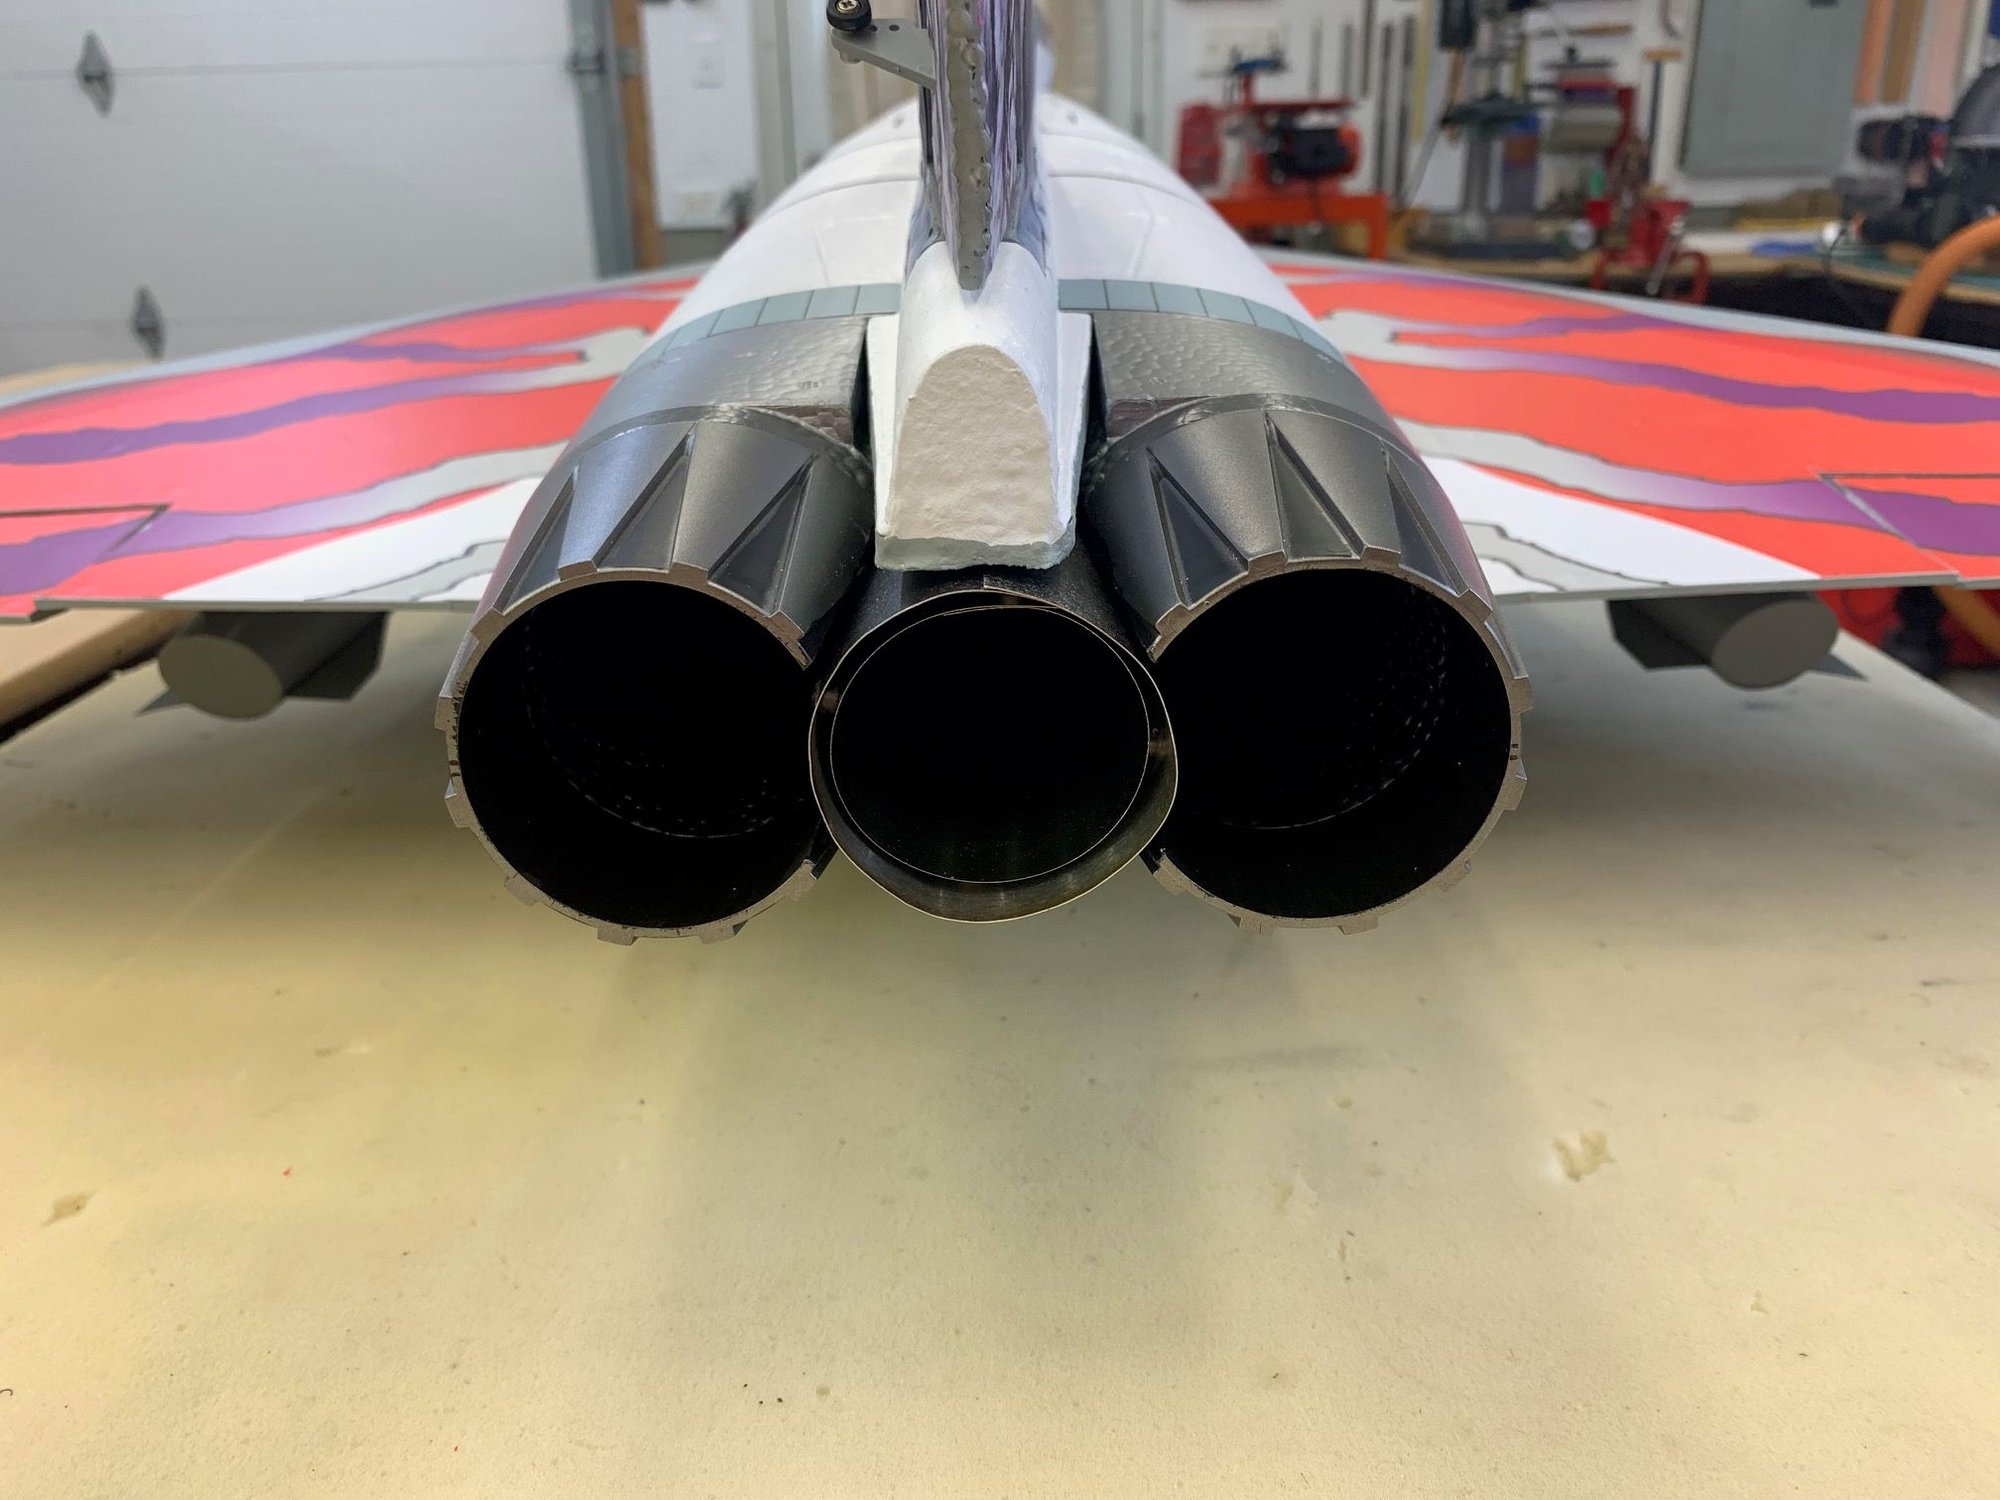
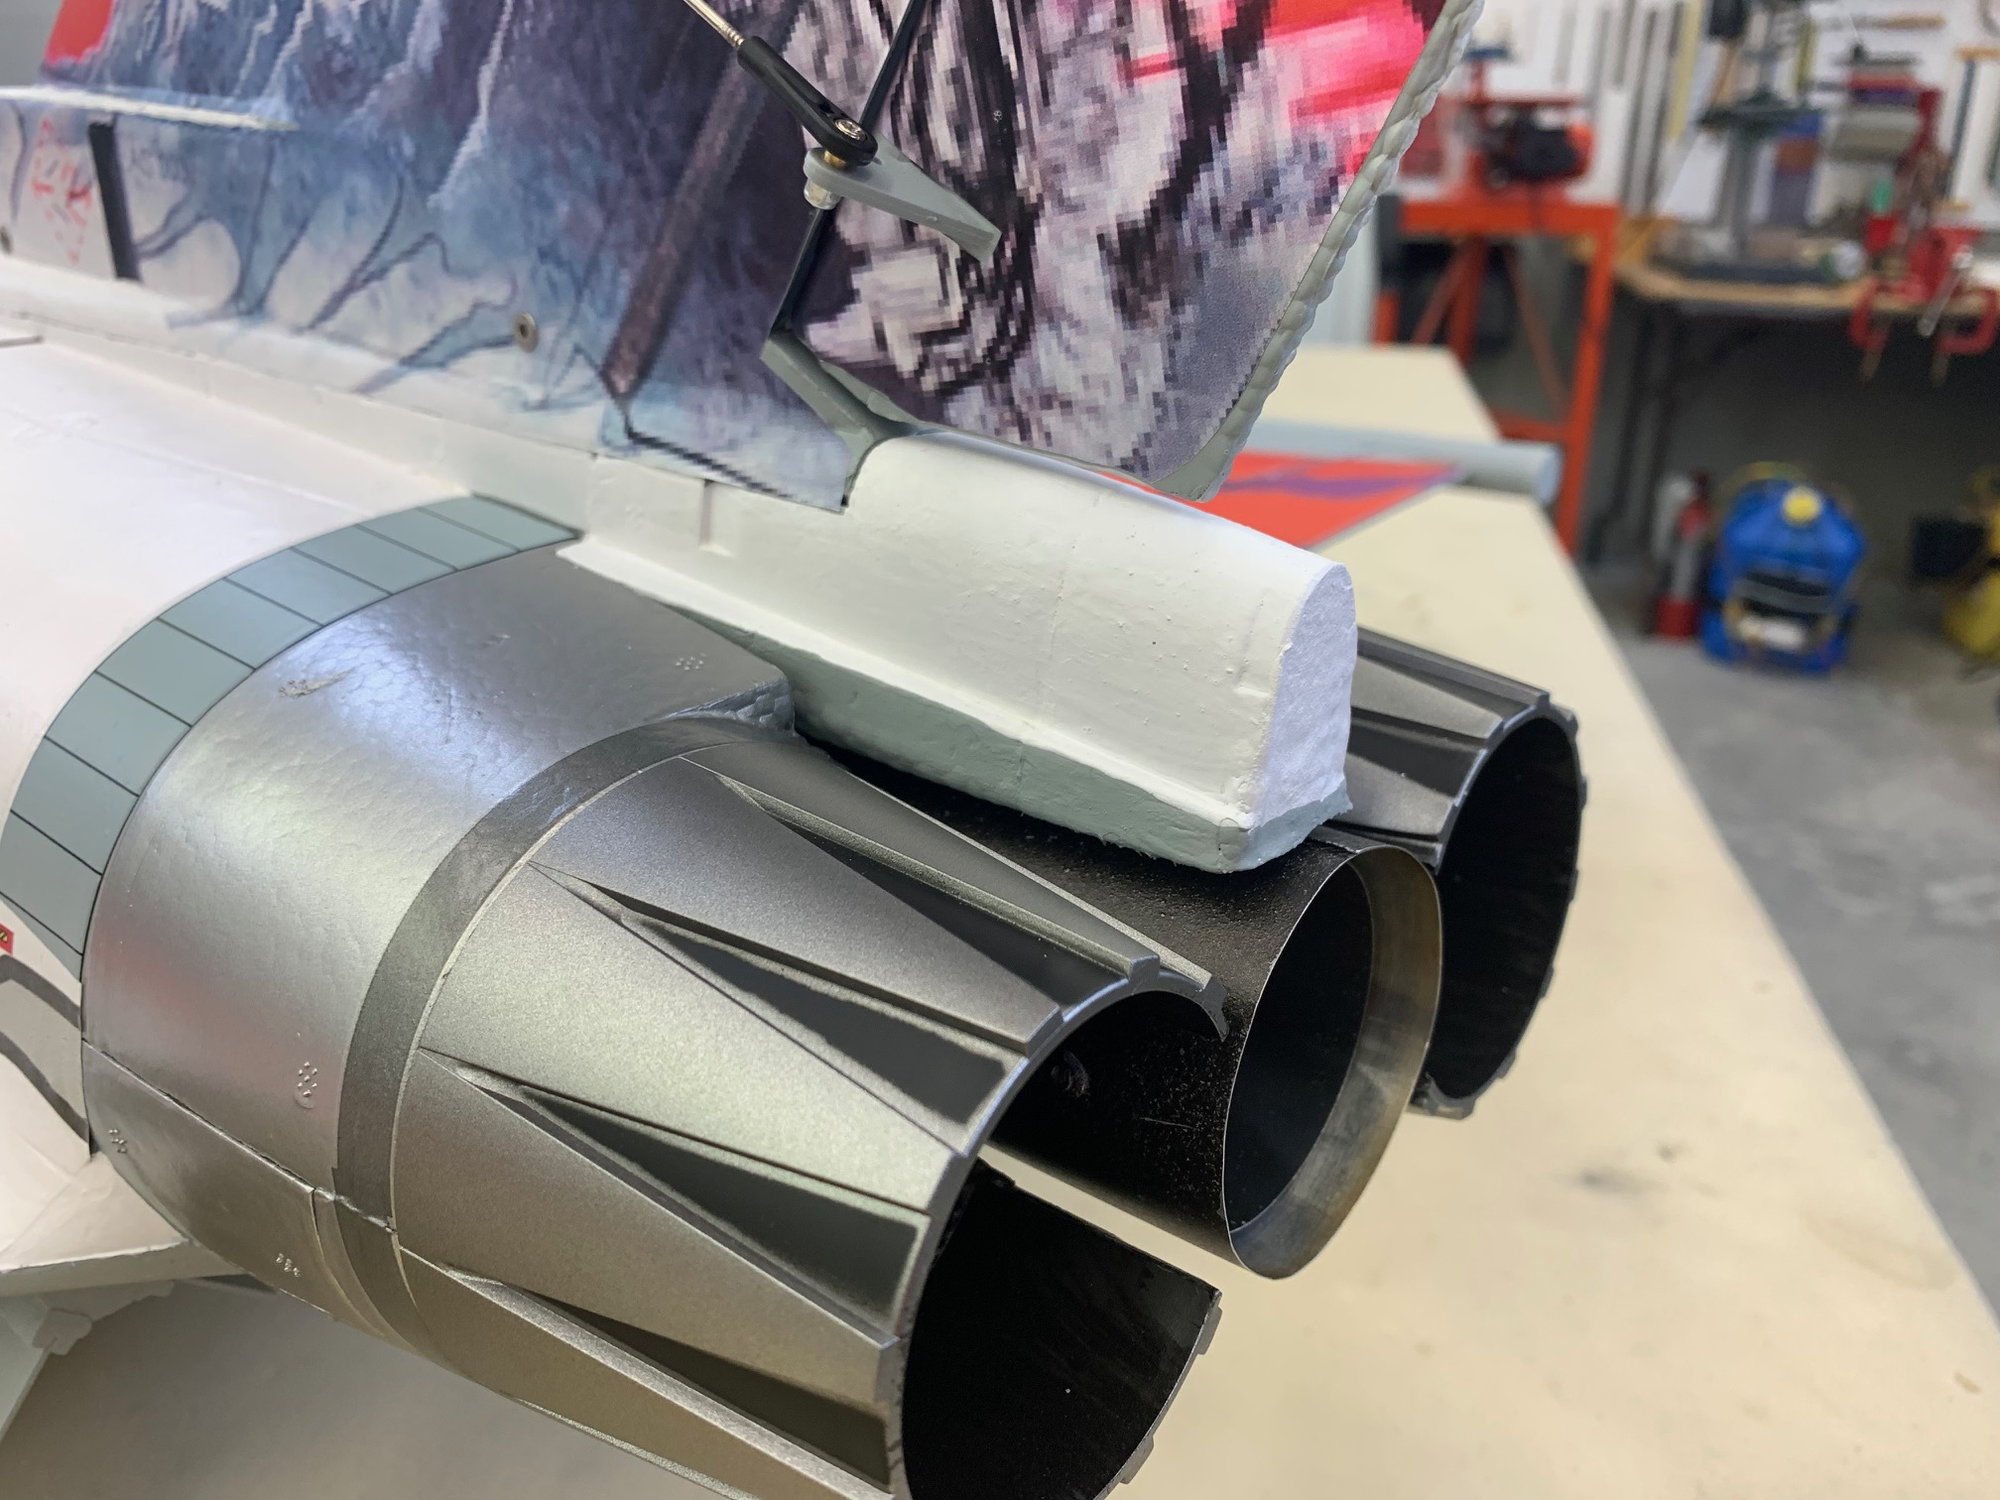
I also repainted foam inside the dual tail pipes on the model to match the paint on the pipe. I had forgot to do this before.
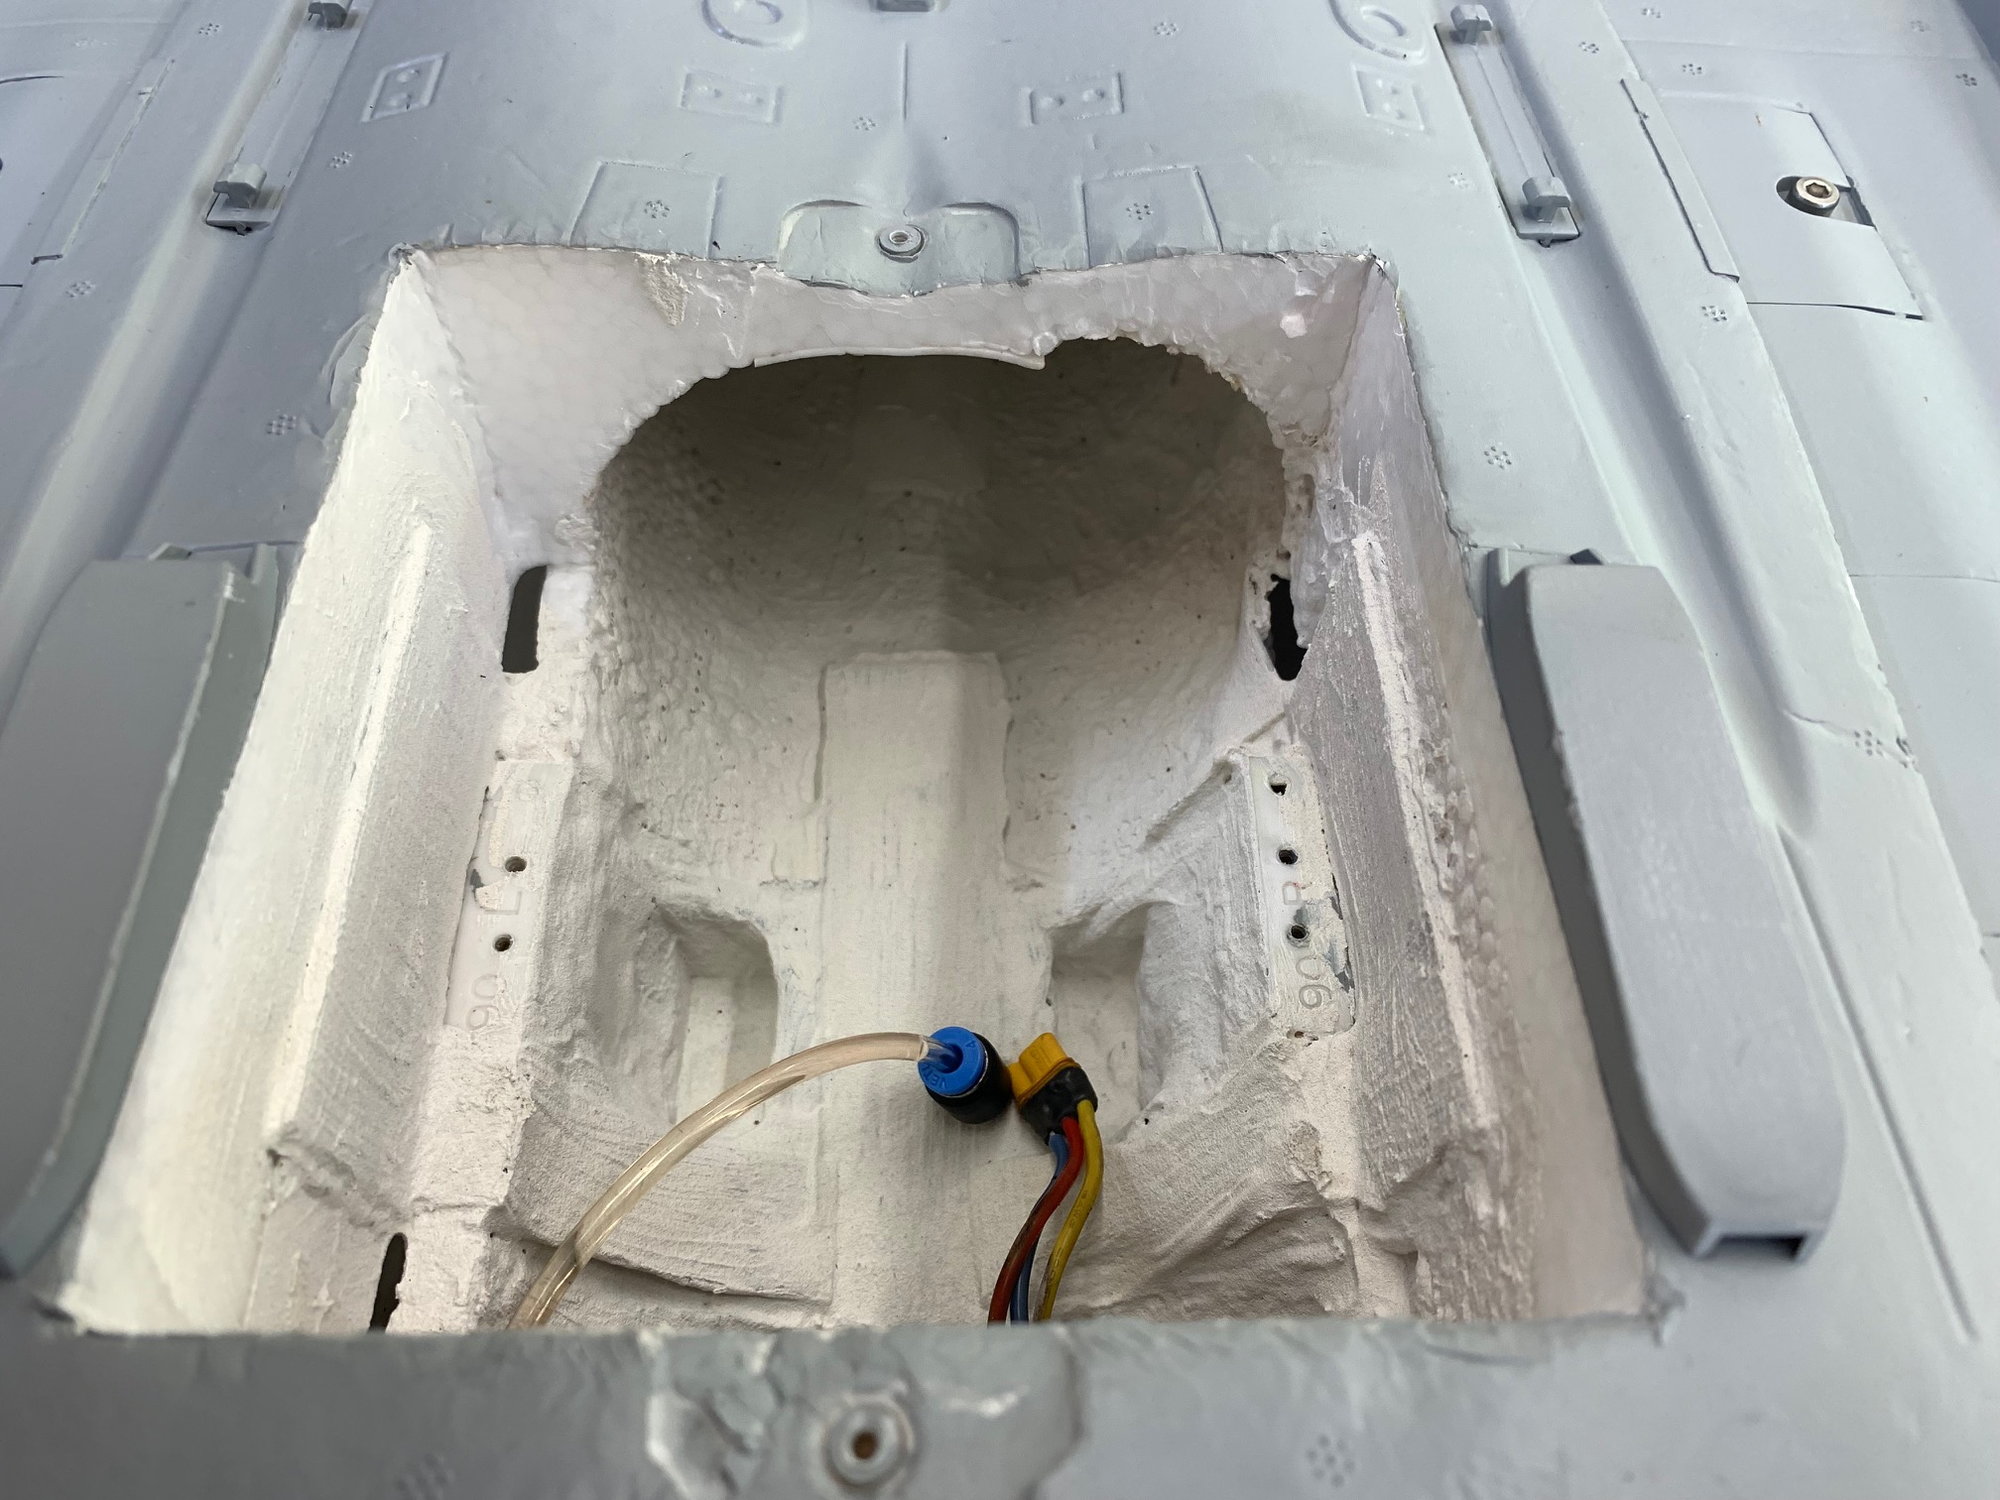
The internal repairs were easy. The fire did not damage anything except some foam. I simply cleaned up the mess and recoated everything with BVM Heat Shield.

The hatch was repaired the same way. I already had another pipe cone ready so it was an easy replacement.

Turbine installed and ready for test runs.

Jet ready to start on table. This started a string of unexpected events.
First start was with the bottom hatch off. Turbine started right up and ran with no issues. After shutdown I saw fuel drips on the table under the turbine. Investigation revealed the fuel line under the turbine was wet as well as the fuel fitting. I inspected the area and found the Festo fuel nut fitting was loose in the turbine. I was able to easily turn the bottom nut by hand and again with an 8mm open end wrench. I trimmed and reinstalled the 4mm fuel tubing. Ok ready for second try.
Second start was with bottom hatch off again. Started right up and ran correctly. I shut down and see fuel drips again on the table under the turbine. Fuel line and fitting were wet again. I found a replacement 4mm elbow fuel fitting from some Kingtech parts and installed it on the turbine. Ready for third try.
Third start was with bottom hatch off again. Turbine started and ran correctly and there were no drips. The fuel line and fitting were dry as it should be. Yea!
Forth start was just to check and convince myself it was not leaking. It worked and all was dry.
Fifth start was with bottom hatch installed. The turbine lit off and started to spool up. Then it quit. Cooling started and finished. Duh... what now? Lets try again.
Sixth start with bottom hatch installed failed same as above. Cooling was good and finished ok. Now what... is the bottom hatch blocking air, no cant be, I've flown the jet many times...what's going on??? Then I thought of the battery...it was in storage charge when I started testing...Yep battery is low...I charged it and crossed my fingers.
Seventh start was with bottom hatch on, charged battery, and all worked good. Thought it was too good to be true so I started it again.
Eighth start was just to convince me that it was really working...and it was. Good start, good runups, good cooling, and everything was dry. OK done with it.

Here is the culprit. The threads were clearly loose. I don't ever remember checking the tightness of this fitting on any turbine before in all 23 years I've been using them, but I will now. Not sure if loose threads made the leak worse or not. However, the Festo push to connect part was leaking without any doubt. It may have been the reason for the fuel leak and fire before. It's gone now and everything works good.

The Eurofighter is sitting on it's storage perch now waiting for a cooler weather...
I had to cut off about 5mm of the stinger below the rudder. The fire ate it up pretty bad.
After I cut it I covered the rear end with BVM heat shield and repainted.
I also repainted foam inside the dual tail pipes on the model to match the paint on the pipe. I had forgot to do this before.
The internal repairs were easy. The fire did not damage anything except some foam. I simply cleaned up the mess and recoated everything with BVM Heat Shield.
The hatch was repaired the same way. I already had another pipe cone ready so it was an easy replacement.
Turbine installed and ready for test runs.
Jet ready to start on table. This started a string of unexpected events.
First start was with the bottom hatch off. Turbine started right up and ran with no issues. After shutdown I saw fuel drips on the table under the turbine. Investigation revealed the fuel line under the turbine was wet as well as the fuel fitting. I inspected the area and found the Festo fuel nut fitting was loose in the turbine. I was able to easily turn the bottom nut by hand and again with an 8mm open end wrench. I trimmed and reinstalled the 4mm fuel tubing. Ok ready for second try.
Second start was with bottom hatch off again. Started right up and ran correctly. I shut down and see fuel drips again on the table under the turbine. Fuel line and fitting were wet again. I found a replacement 4mm elbow fuel fitting from some Kingtech parts and installed it on the turbine. Ready for third try.
Third start was with bottom hatch off again. Turbine started and ran correctly and there were no drips. The fuel line and fitting were dry as it should be. Yea!
Forth start was just to check and convince myself it was not leaking. It worked and all was dry.
Fifth start was with bottom hatch installed. The turbine lit off and started to spool up. Then it quit. Cooling started and finished. Duh... what now? Lets try again.
Sixth start with bottom hatch installed failed same as above. Cooling was good and finished ok. Now what... is the bottom hatch blocking air, no cant be, I've flown the jet many times...what's going on??? Then I thought of the battery...it was in storage charge when I started testing...Yep battery is low...I charged it and crossed my fingers.
Seventh start was with bottom hatch on, charged battery, and all worked good. Thought it was too good to be true so I started it again.
Eighth start was just to convince me that it was really working...and it was. Good start, good runups, good cooling, and everything was dry. OK done with it.
Here is the culprit. The threads were clearly loose. I don't ever remember checking the tightness of this fitting on any turbine before in all 23 years I've been using them, but I will now. Not sure if loose threads made the leak worse or not. However, the Festo push to connect part was leaking without any doubt. It may have been the reason for the fuel leak and fire before. It's gone now and everything works good.
The Eurofighter is sitting on it's storage perch now waiting for a cooler weather...
07-22-2023, 02:37 PM
#89
Gary, love the way you approach a problem! What you found will now make me go and do a close check on all of my jets, more though than usual, plus we have a big local jet meeting here next month. I would rather be flying than messing around in the pits!
07-22-2023, 05:10 PM
#90
Thread Starter
My Feedback: (20)
It's been real hot here. Temps running between 95-100F/35-37C with heat index up to 110F/43C. Mornings are best but you want to be done by noon. I'll wait for a cooler spell to fly it again.
Gary
