Balsa USA northstar
 06-05-2023, 04:38 AM
#26


Here’s something a little funny…
I was looking back at the BALSAUSA photo of the NorthStar sitting in the water.
....To put all the pieces together in my head while viewing your build pictures. Mostly, trying to visualize the elevator and engine mounting.
As I was looking at it I was thinking sure looks funny how it’s sitting in the water. Then I realized…It’s got wheels on it… LOL. They have it sitting in the water but standing on wheels…
I imagine if it was actually floating, the majority of the fuse would be under water and not make a good marketing photo..
With any luck we’ll get to see some pictures of yours floating in the water.
Last edited by RICKSTUBBZ; 06-05-2023 at 04:41 AM.
 06-05-2023, 05:53 AM
#27


Rick,
I never noticed the wheels in the water photo, but your right, they set the plane there to make it look like it was floating....
First off, yes I will take pics of the plane in the water, but I will first finish it, then fly it off land several times to get the c/g correct and dial it in.
There is no boat in my household, so I need to make sure it is completely ready once it hits the water.
I have 4 really nice lakes close to me and all would be excellent for flying this thing. I'm really looking forward to lake flying, kinda different but fun.
Last one I did for a guy was a blast on the water, flew very quick, and landed really nice.
This one I get to keep so I'm pumped about it.......................
06-05-2023, 06:02 AM
#28
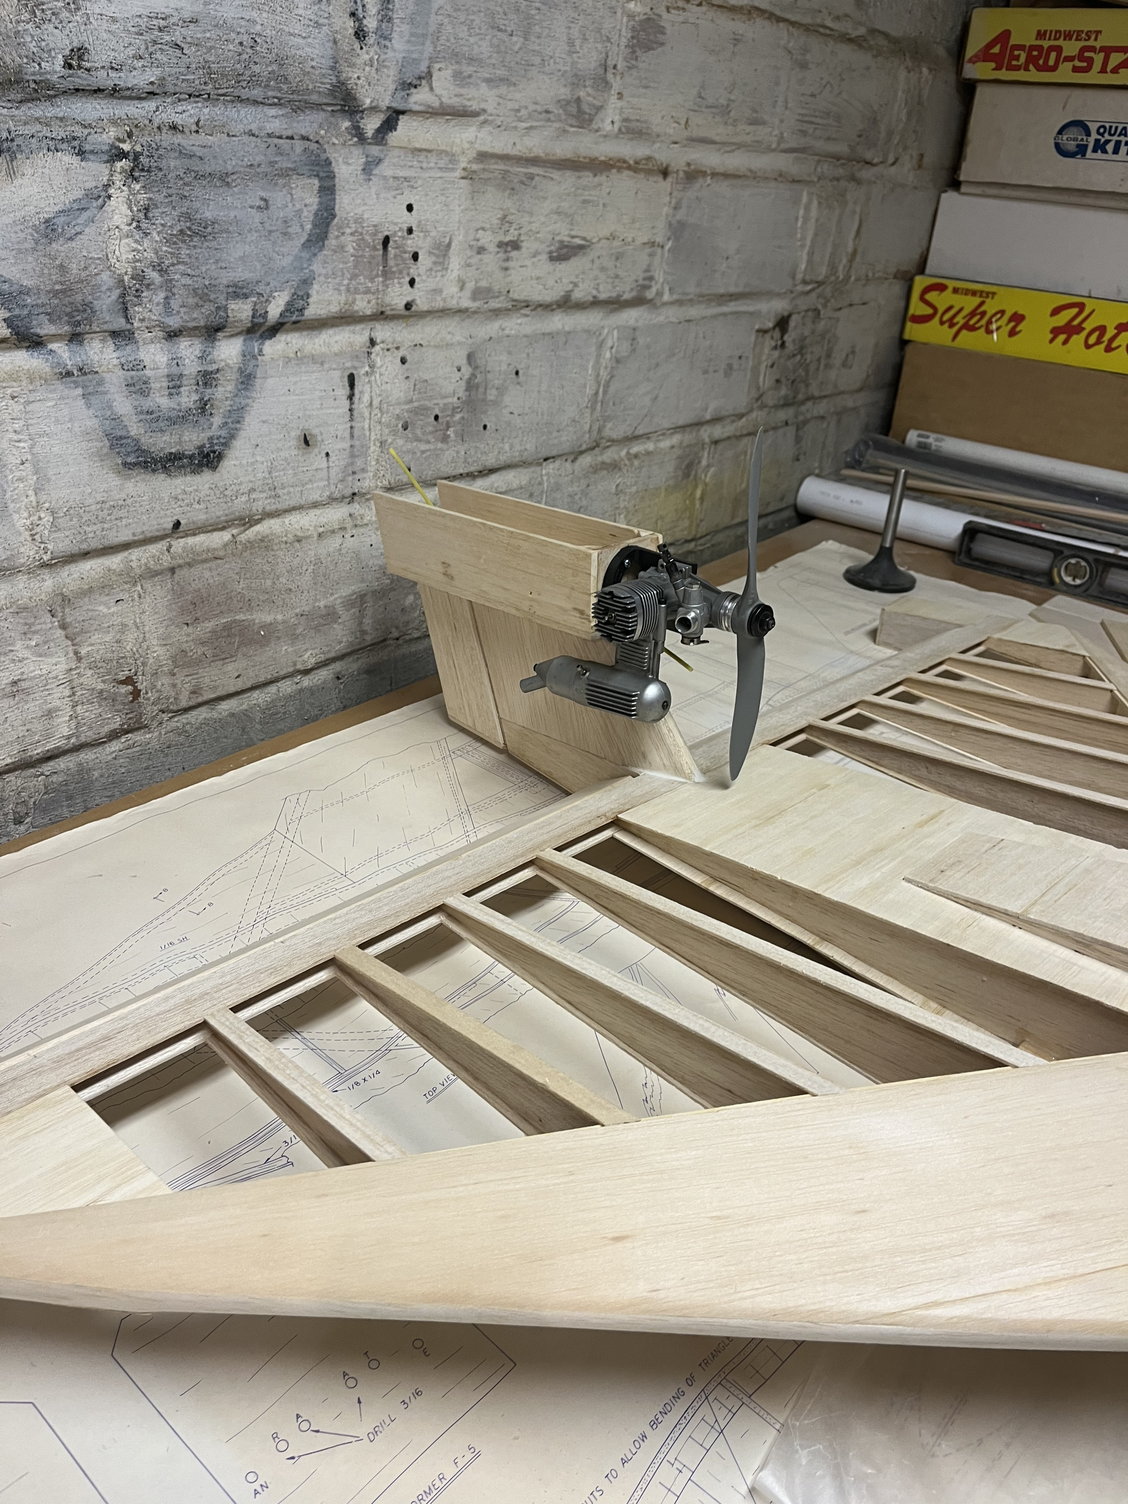
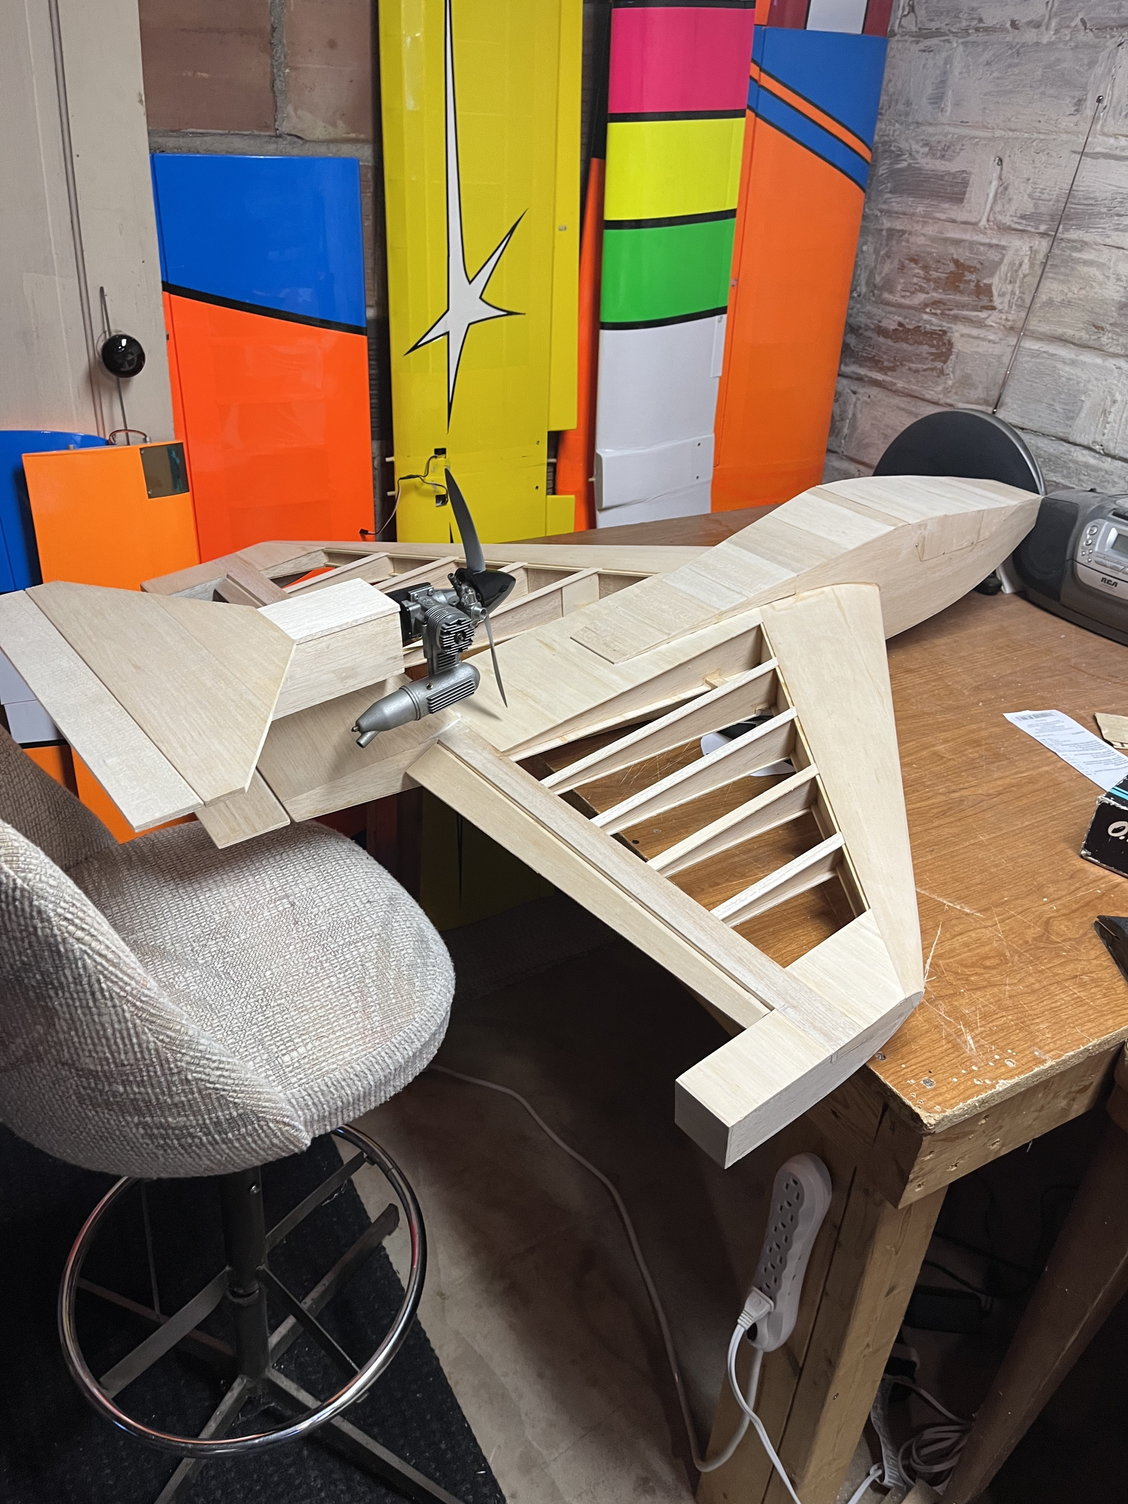
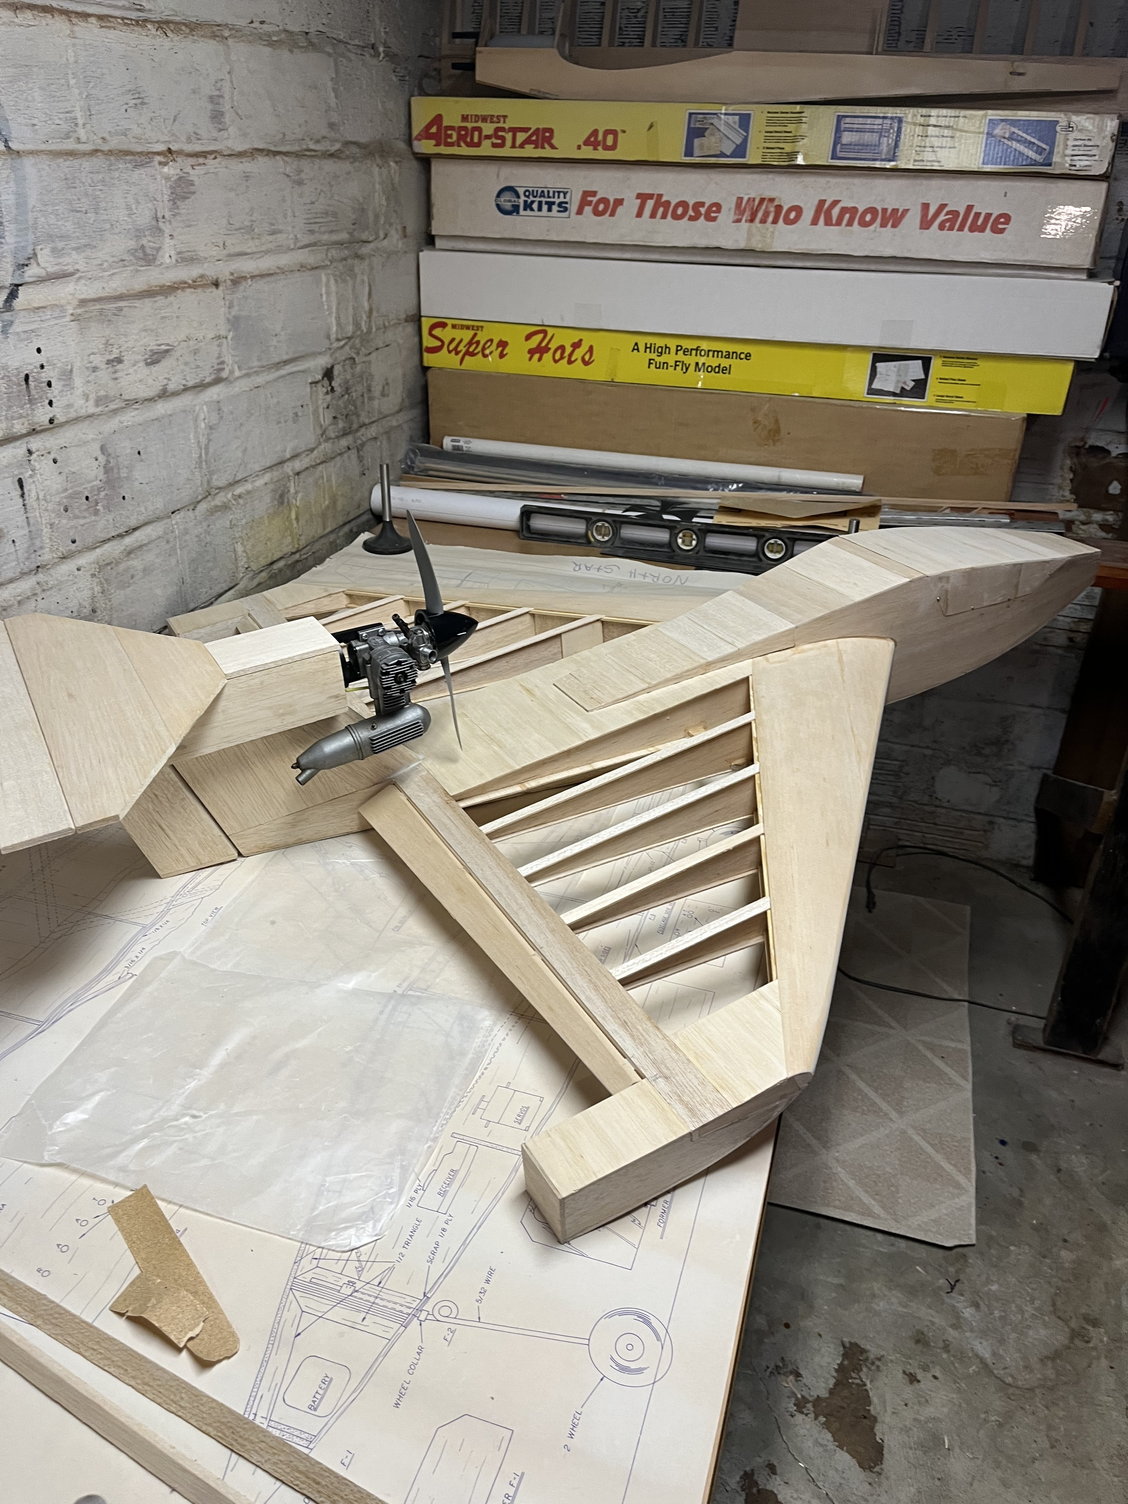
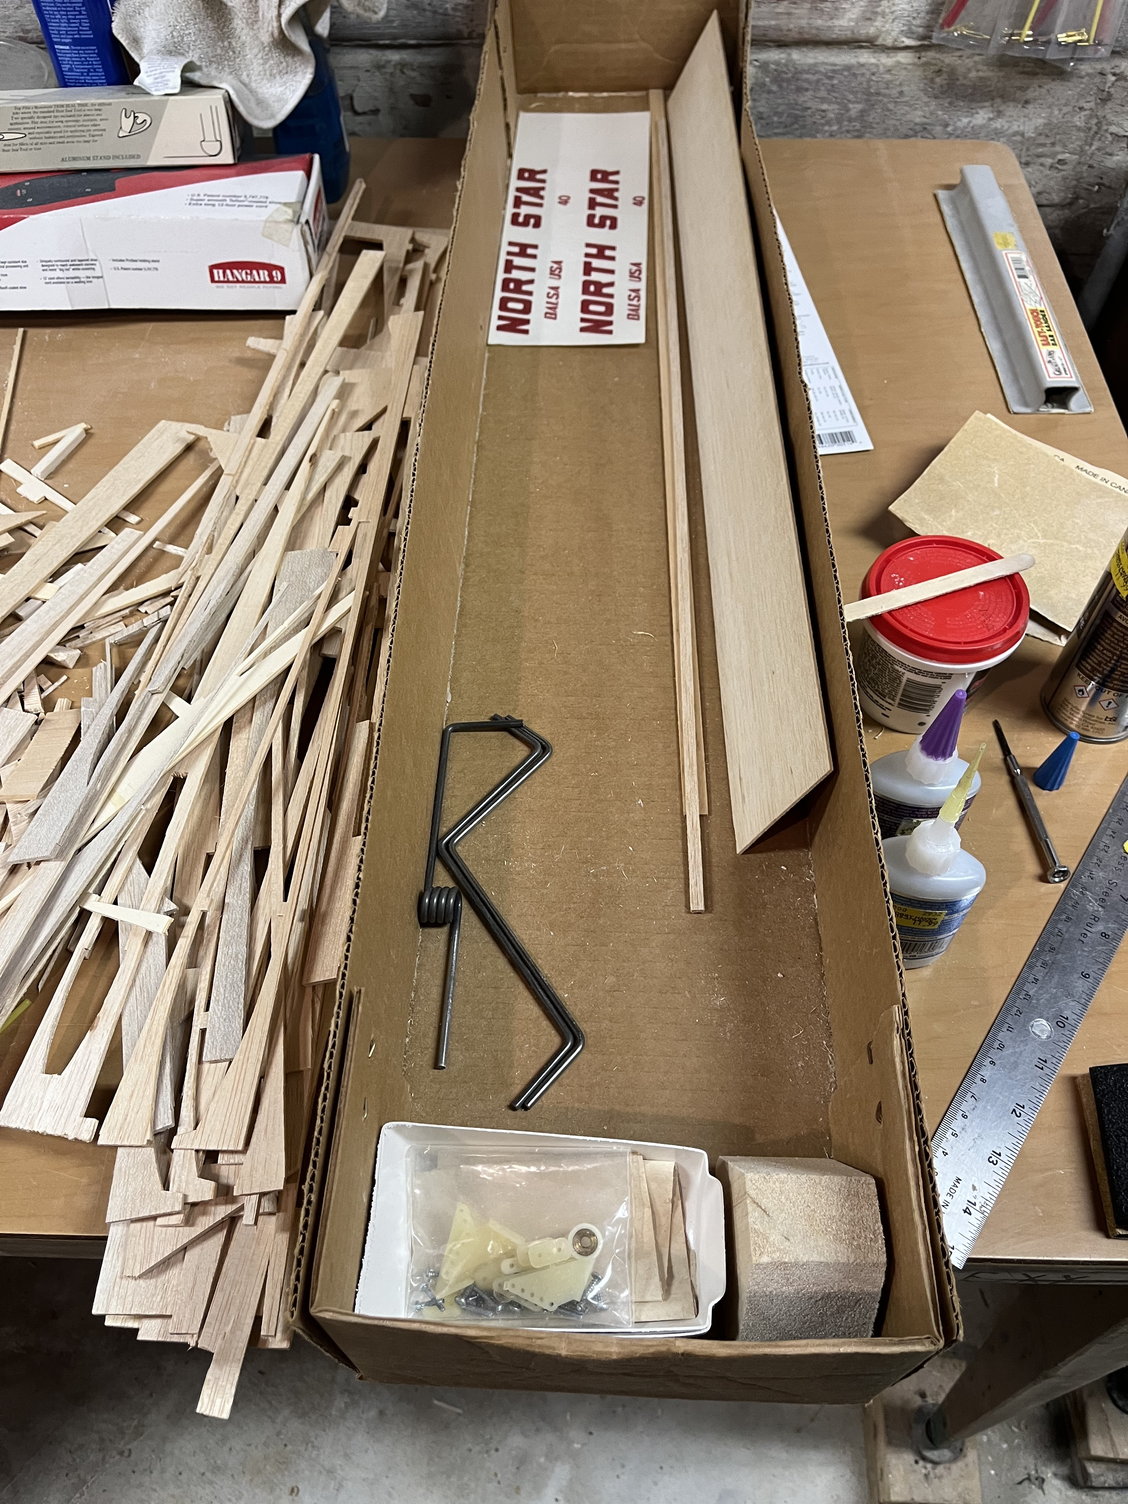
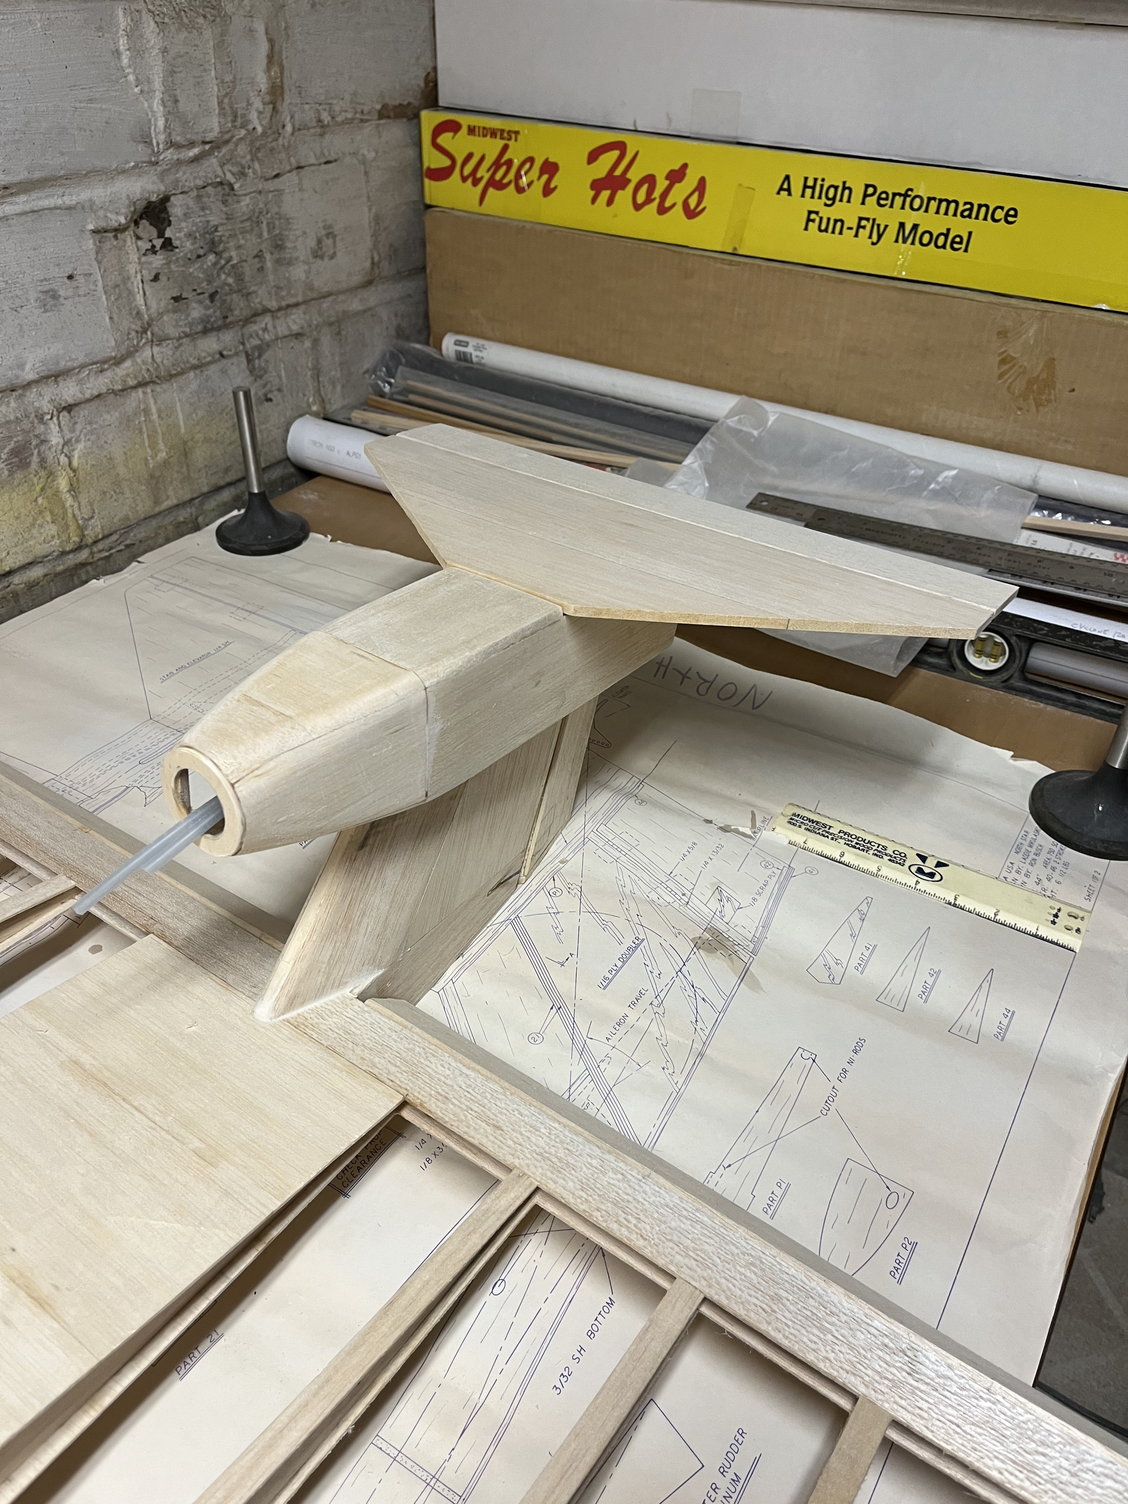
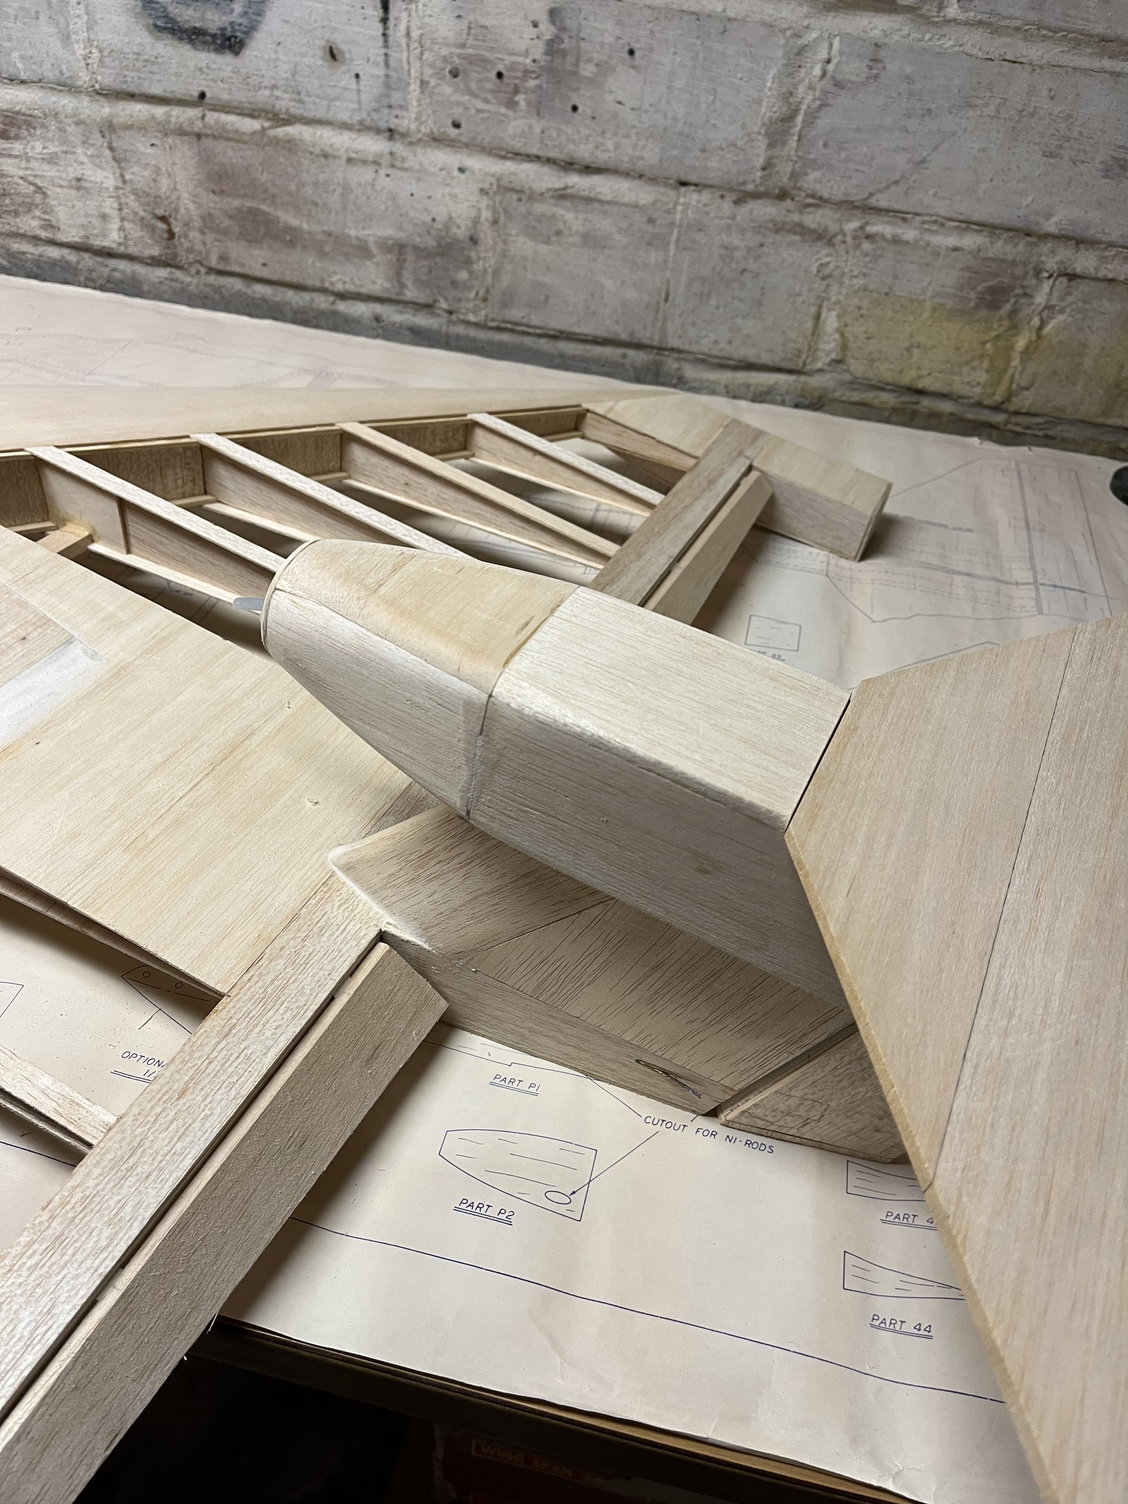
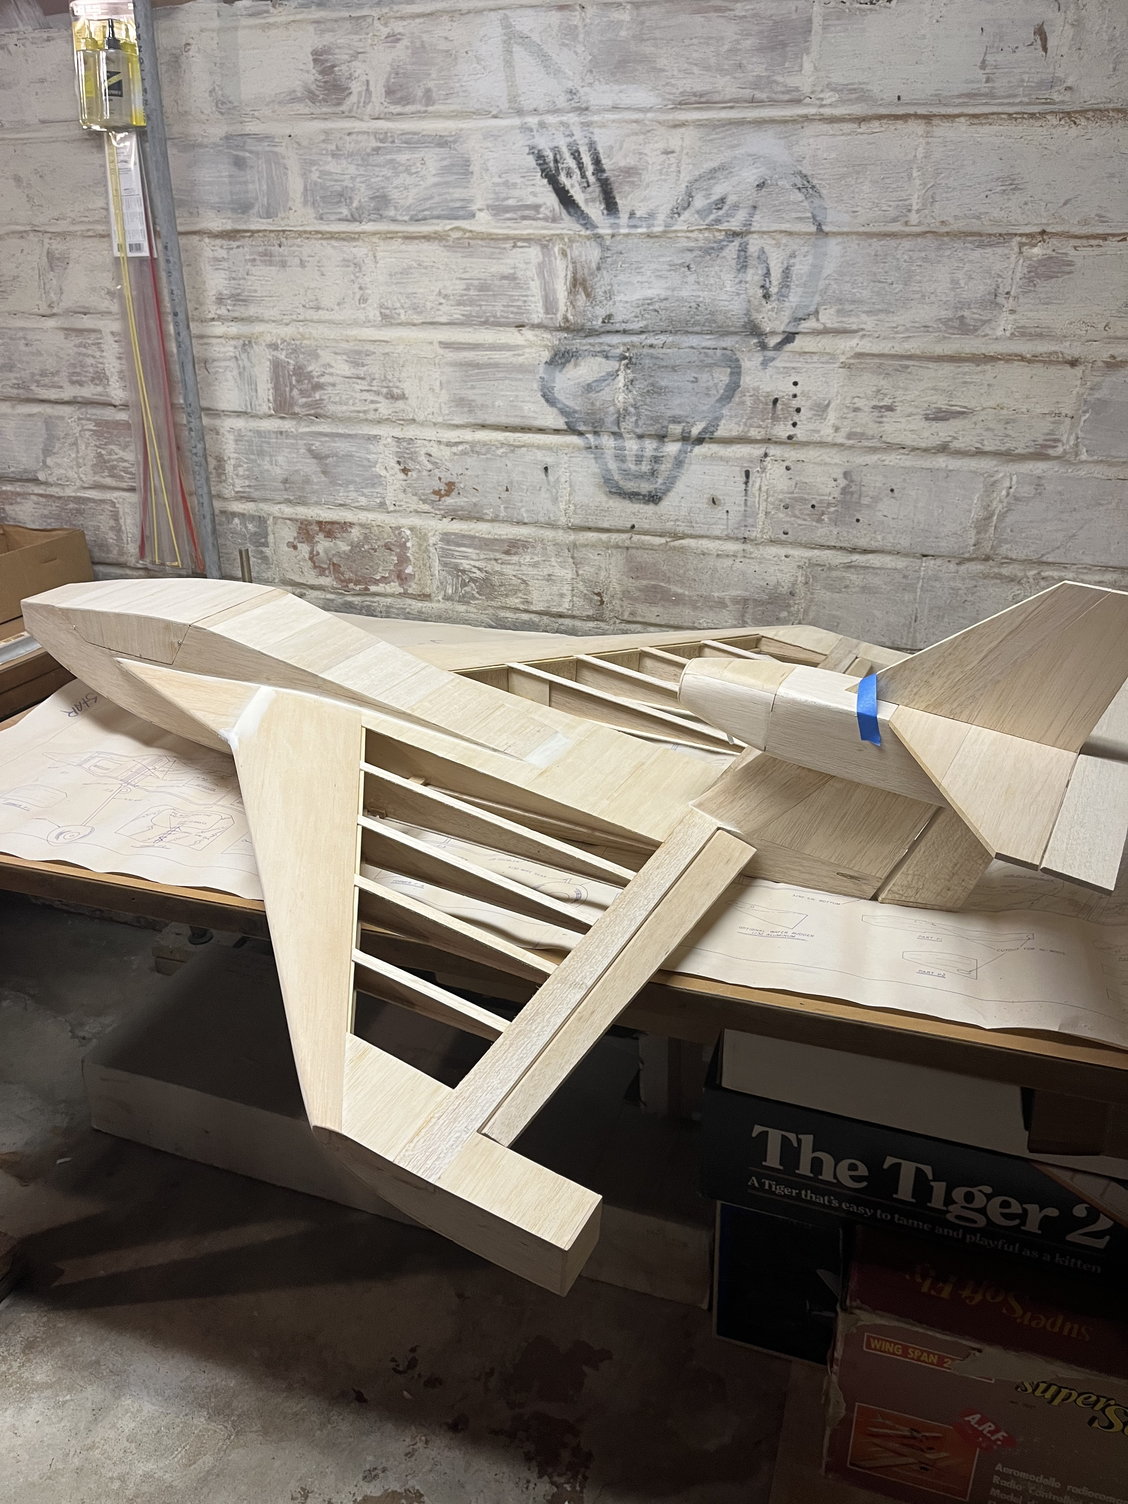
Here is the engine pod going together, I’ll leave the top of it unfinished until I mount it to the plane. The top is a 4” piece of balsa up front and the horizontal stabilizer in back. I’ll install the engine mount, install the pod on the plane, then add the top pieces once cables are attached. 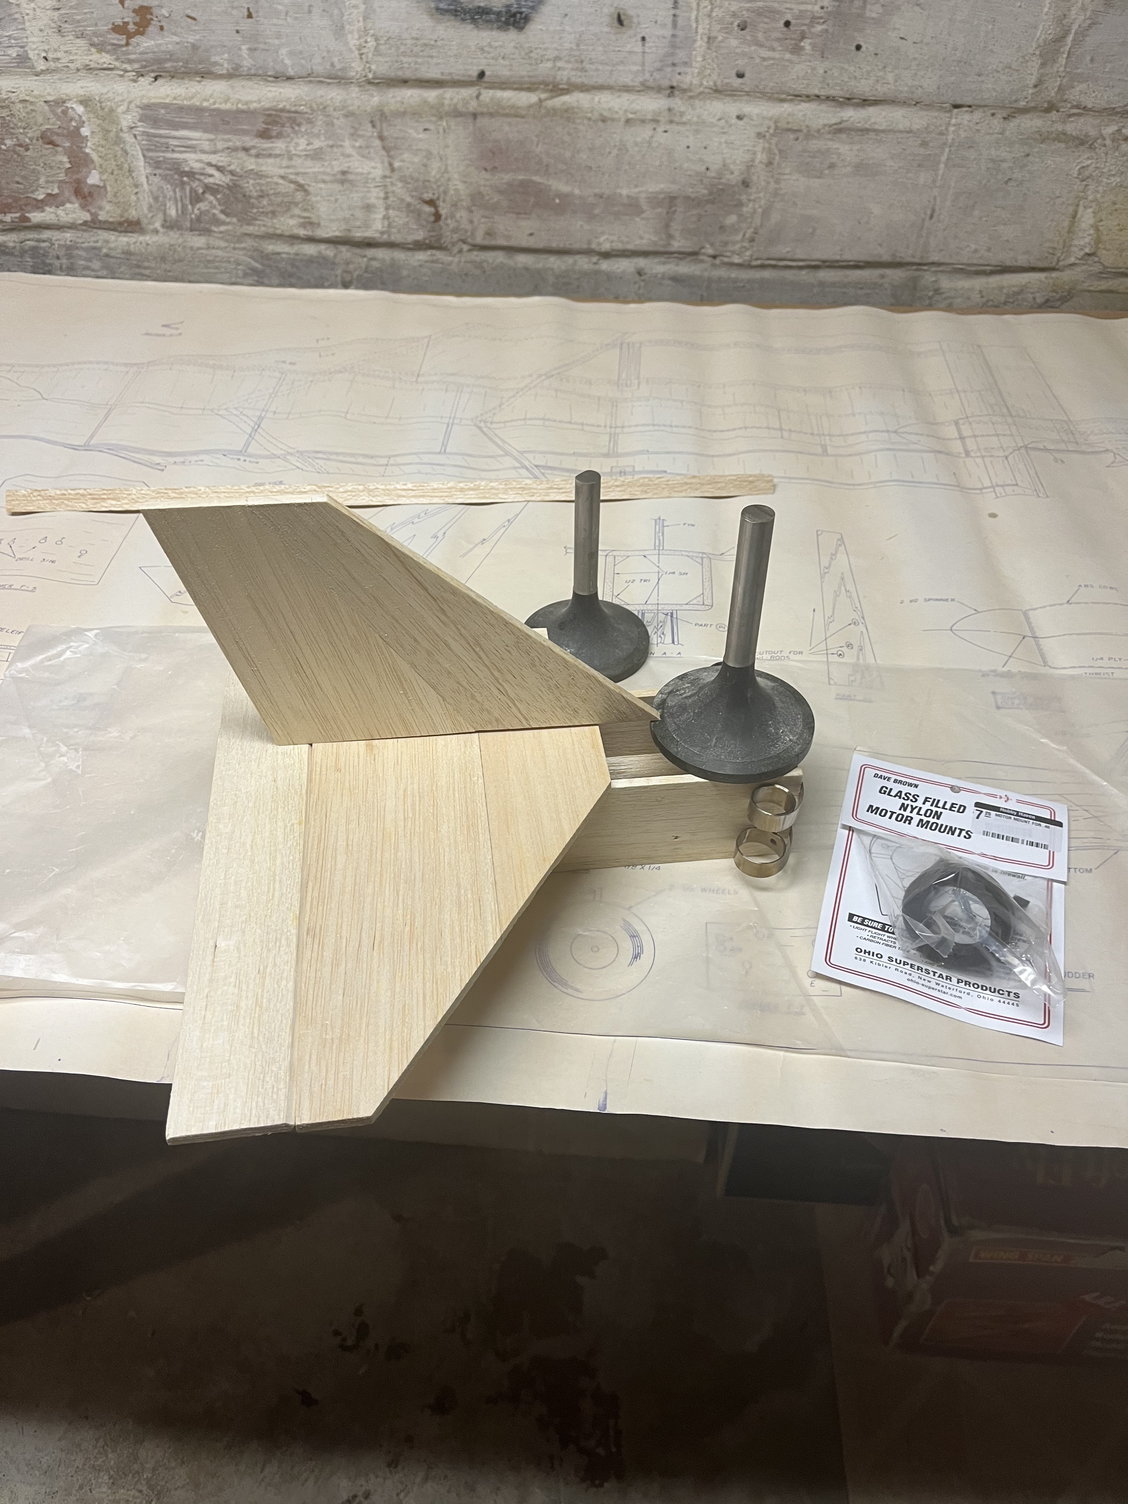
Last edited by plumberdeluxe; 06-05-2023 at 06:10 AM.
06-05-2023, 12:57 PM
#29
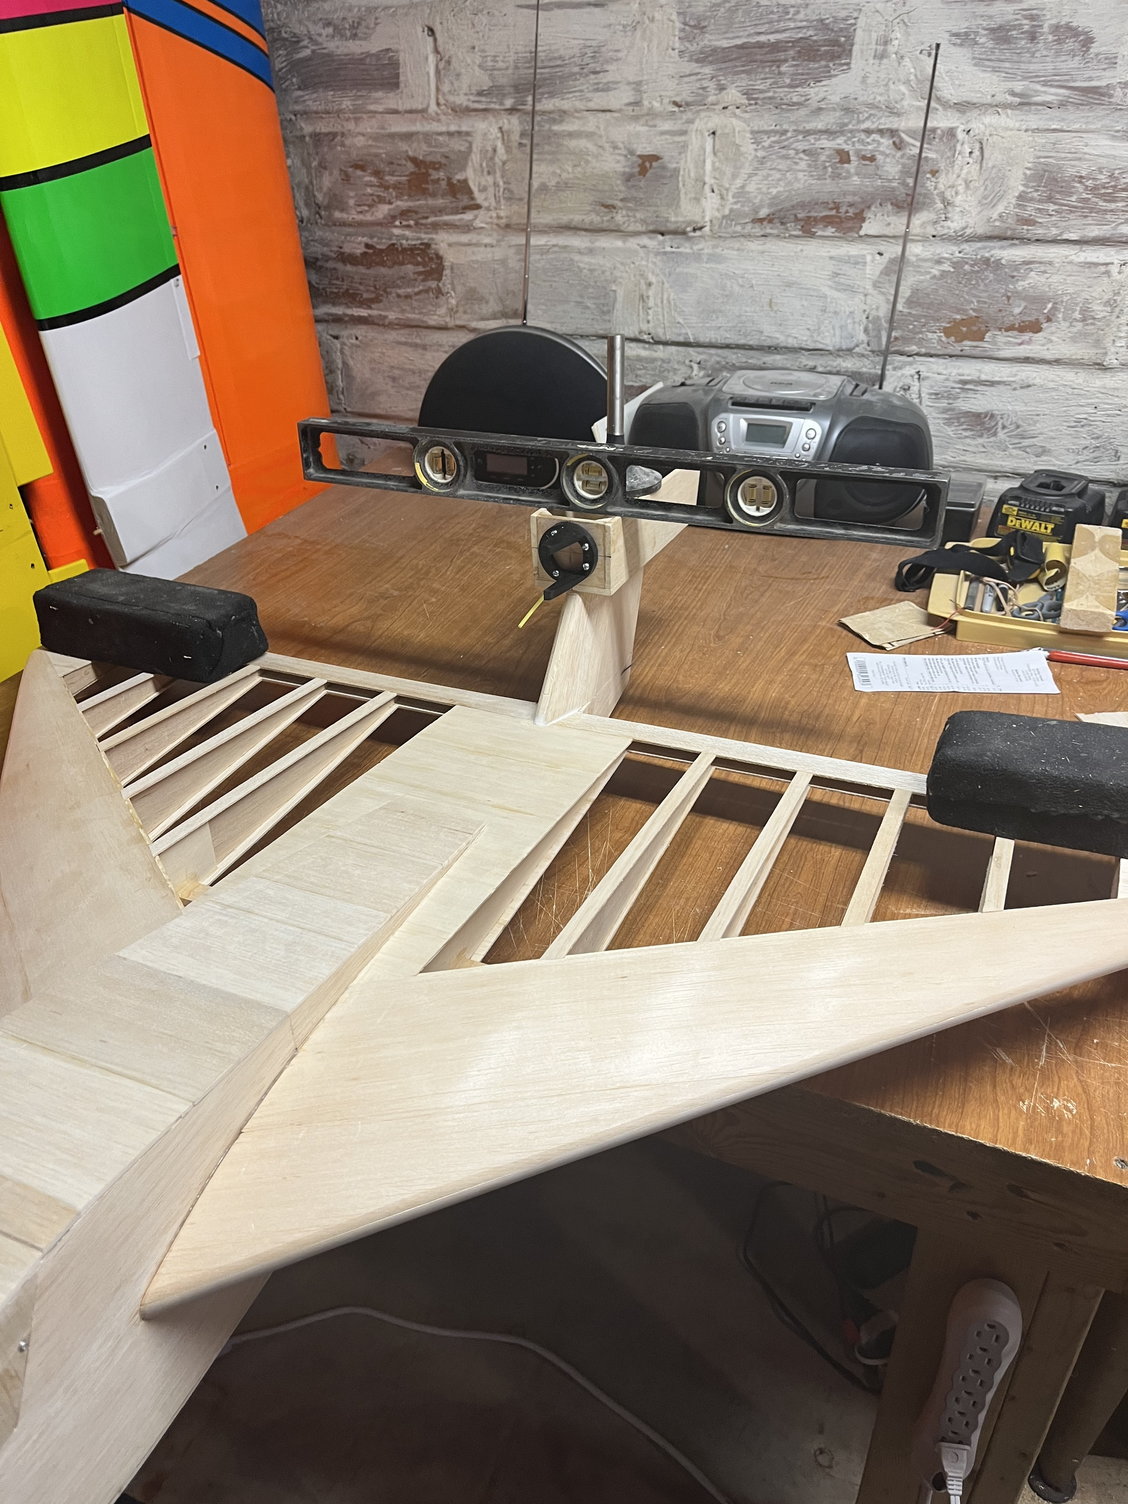
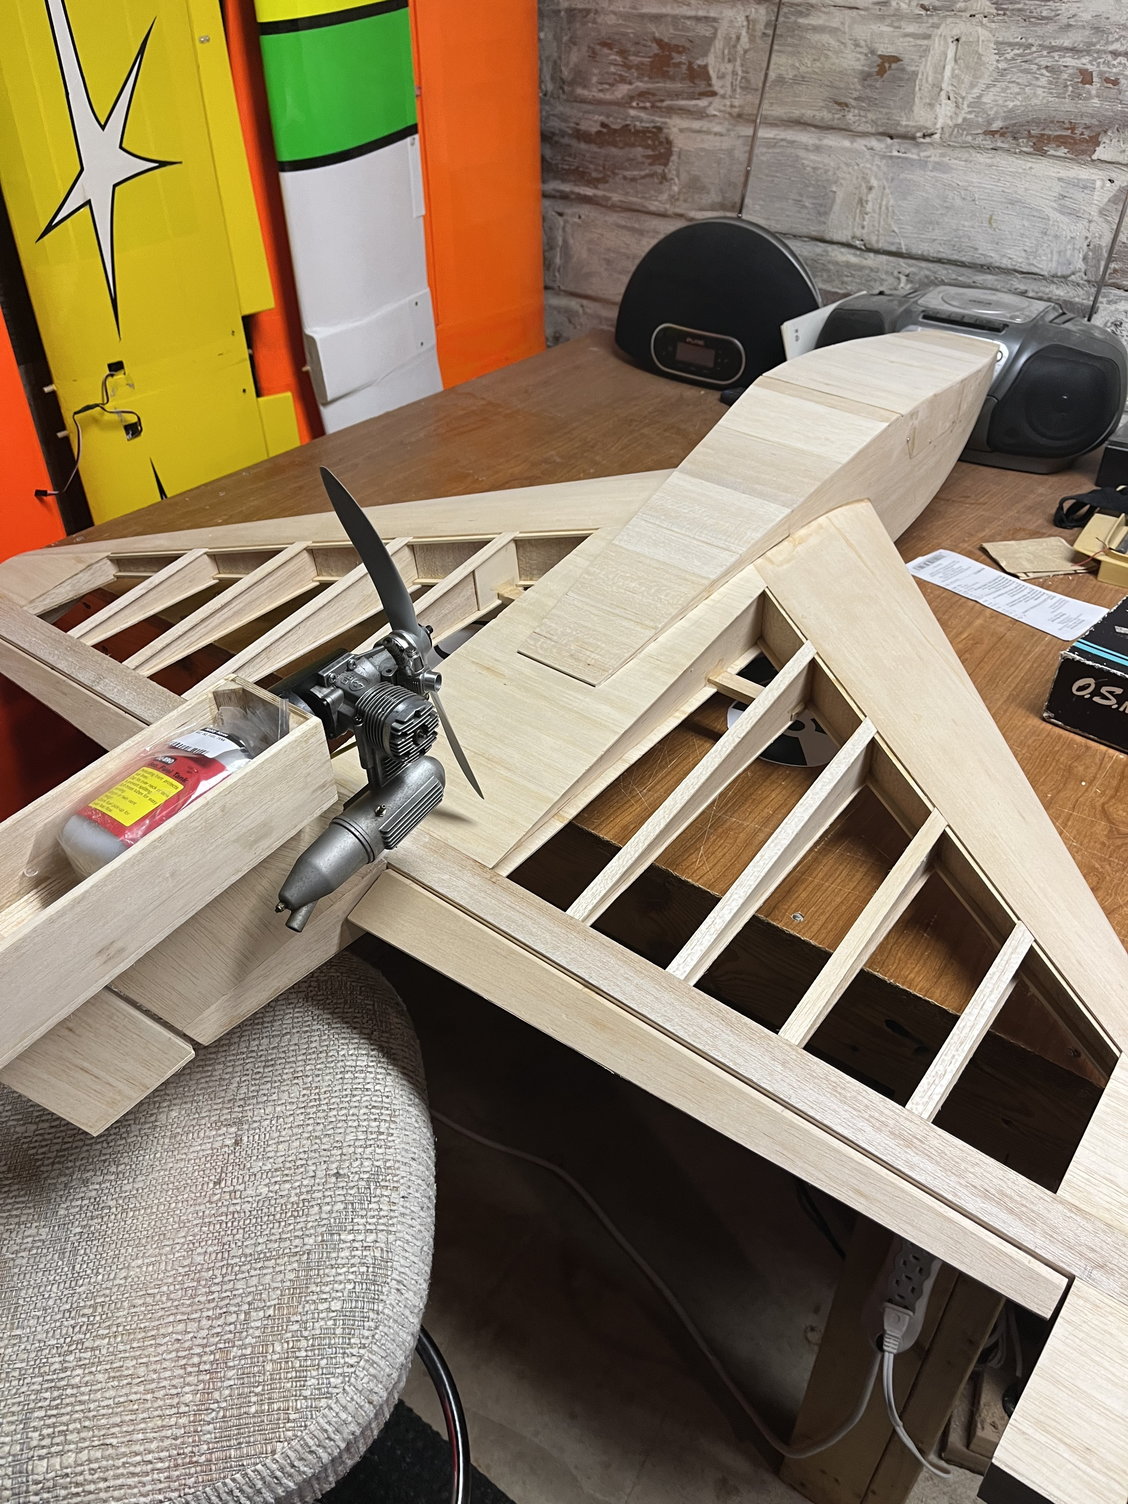
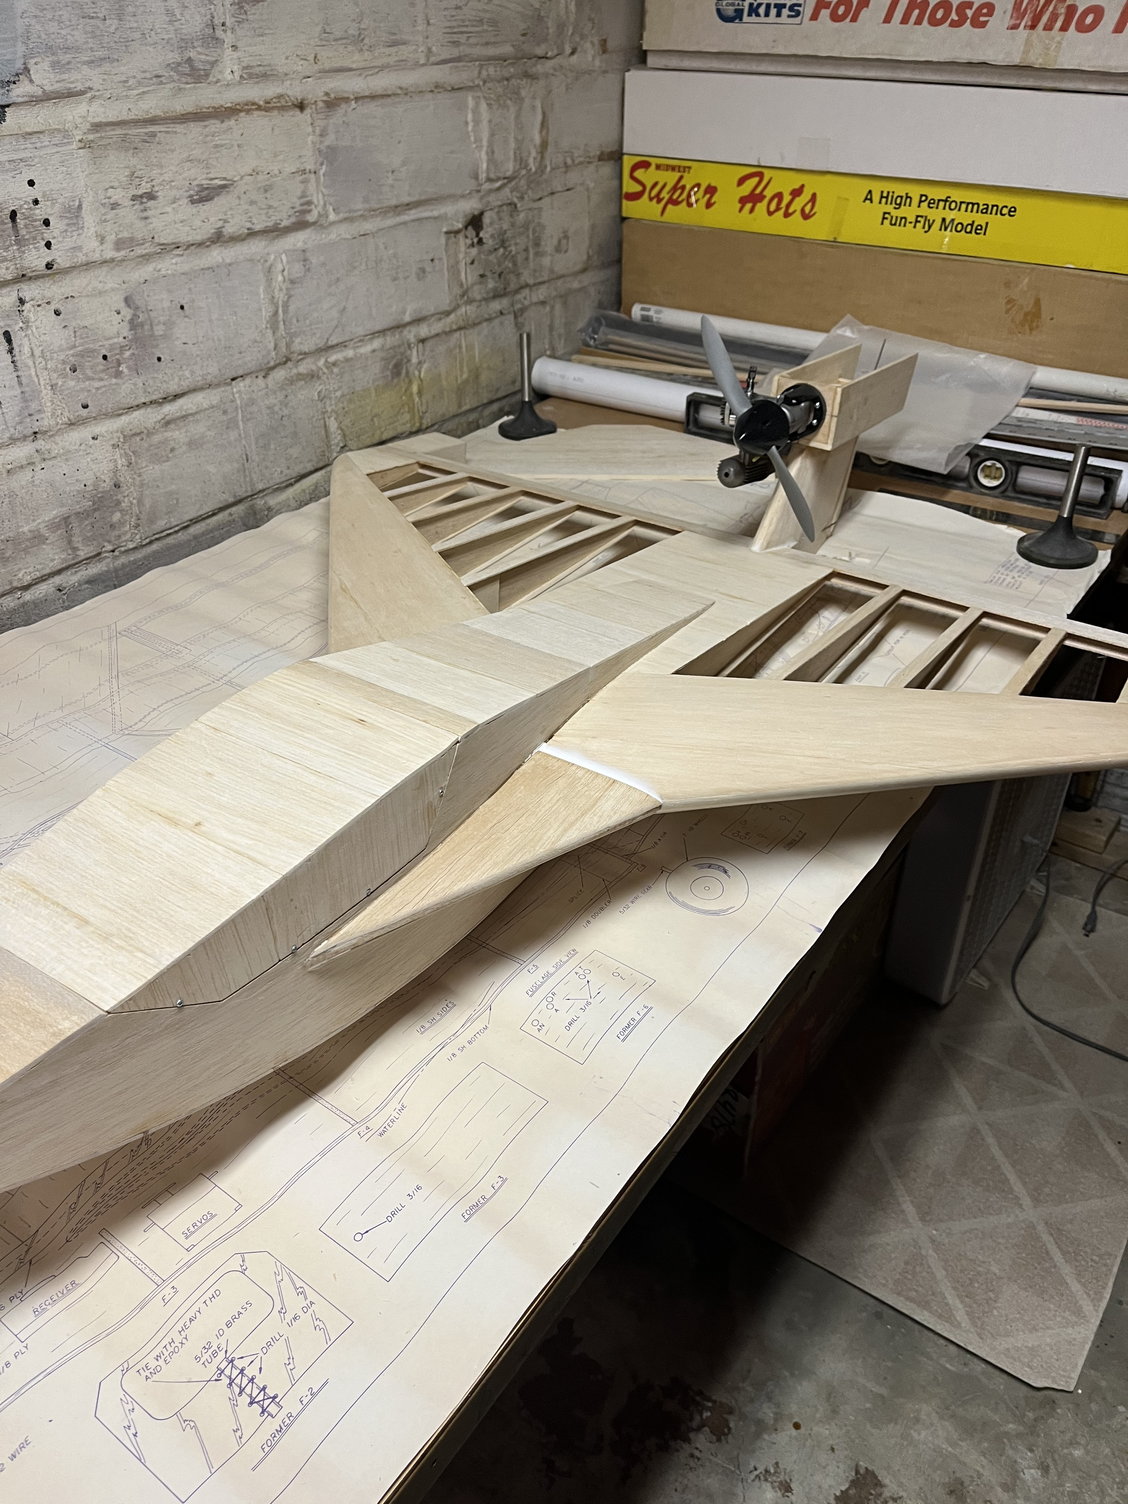
Well the entire build comes to this point. If there is to be any weird stuff on this plane, right here is where it will come from. There is a lot going on here during this step……. Once secure, all that is left is glueing on the tail feathers and mounting the engine. The level says we’re good but I have a goofy table that has me nervous……….

06-05-2023, 02:19 PM
#30
Senior Member
My Feedback: (2)
Join Date: Apr 2020
Location: Metro Atlanta GA, USA
Posts: 383
Likes: 0
Received 33 Likes
on
29 Posts
Thanks for starting this thread. Neat design, and you are a fast builder, doing good work. Definitely a "builder's kit", in that you need some skills, tools, etc., to get it done. A whole lot of thought went into that design. That kind of build is right up my alley, so I am enjoying seeing it come along. I have always been intrigued with BUSA's deltas, but never quite enough to take the plunge and try one. Maybe I will, after I get through with the 3 builds on my plate and forecast now. Probably a Force One, as I am currently building floats for the Javelin that I will soon be building.
It is pretty much the grey area of illegal (USACOE waters) to fly off of the lakes around here, but fortunately my club is able to get sanctioned float flies throughout the year, when there is demand for them.
It is pretty much the grey area of illegal (USACOE waters) to fly off of the lakes around here, but fortunately my club is able to get sanctioned float flies throughout the year, when there is demand for them.
06-05-2023, 02:39 PM
#31
Thank You and I appreciate you popping in and watching the thing come together.
I have built several of all 3 of the BUSA delta planes. I really think any you choose will shock you at how fun they are from the moment you open the box. This Laddie guy must have been one hard core dude, his stuff is designed very well and every one fly amazing. I remember the first one of these I saw was at a float fly in Omaha/Council Bluffs and was instantly hooked, thus my interest in all the others. I will try to dig up pictures of some old builds I have done.
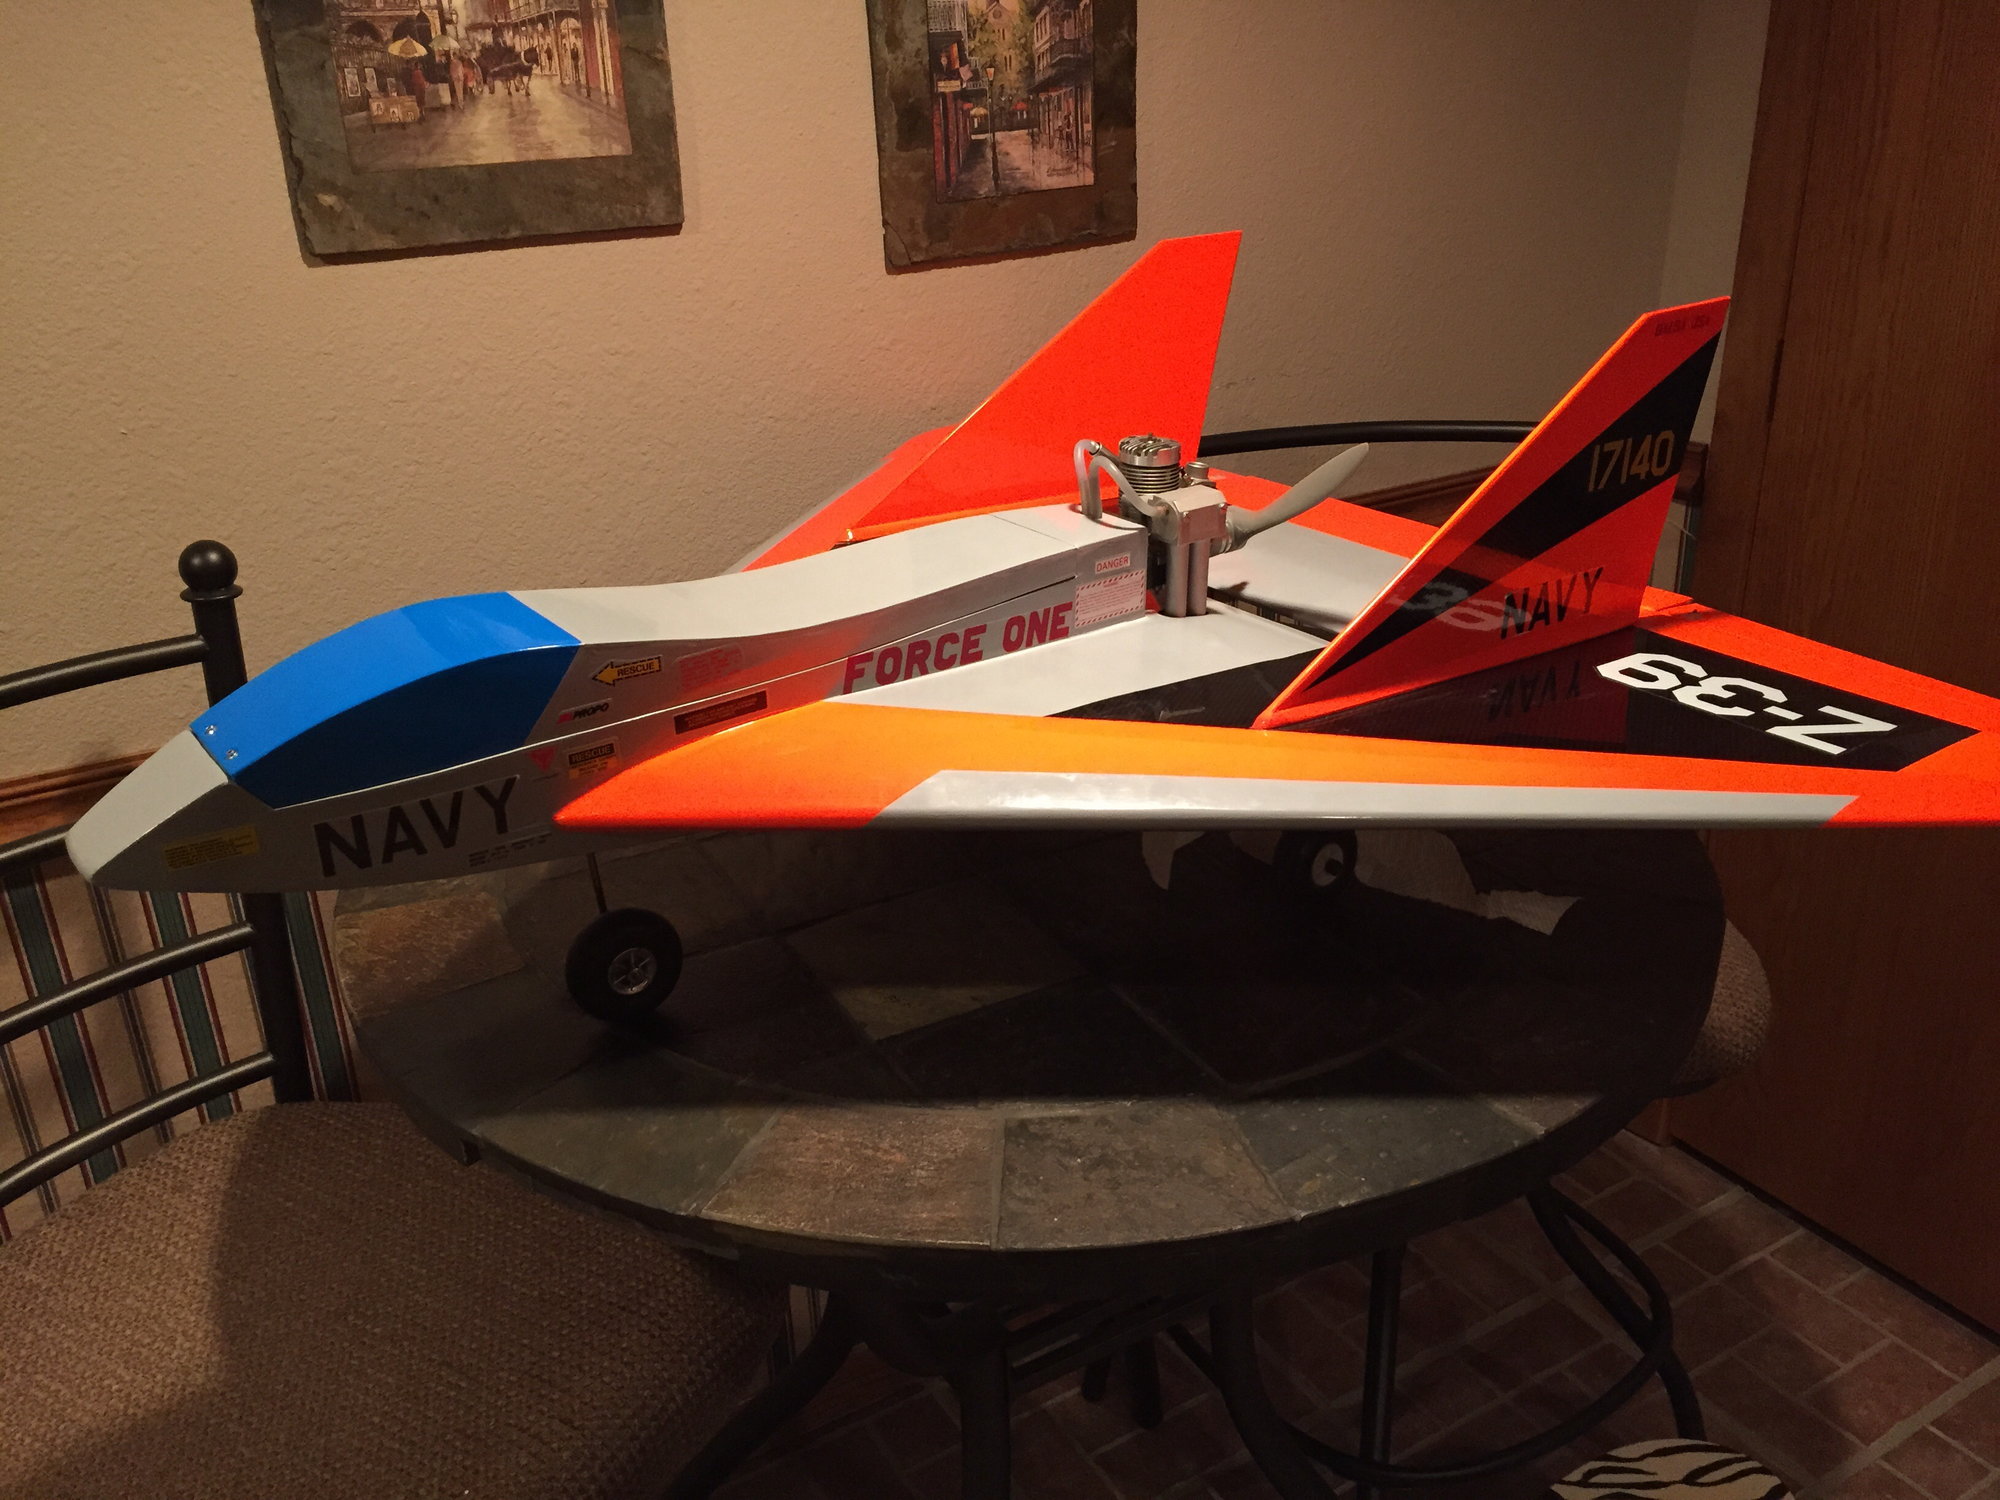
Here is a Force One I did for a buddy....
Thanks again, and hang around till the flying part if you are curious about these deltas.......................
I have built several of all 3 of the BUSA delta planes. I really think any you choose will shock you at how fun they are from the moment you open the box. This Laddie guy must have been one hard core dude, his stuff is designed very well and every one fly amazing. I remember the first one of these I saw was at a float fly in Omaha/Council Bluffs and was instantly hooked, thus my interest in all the others. I will try to dig up pictures of some old builds I have done.
Here is a Force One I did for a buddy....
Thanks again, and hang around till the flying part if you are curious about these deltas.......................
Last edited by plumberdeluxe; 06-05-2023 at 03:28 PM.
06-05-2023, 05:26 PM
#32
A few years back (well a little longer than that...this picture is from 2011) I was given a flying wing. Not sure if this one classifies as a Delta or not...
I put an old OS 45FSR and pipe on it..
I was really surprised at how well this thing flew. Only problem I had was I kept using the rudder stick to slide it around a little. That is wasted motion on this thing except when it's on the ground taxiing..None the less fun to fly. Awkward to get use to watching though. Currently it sets semi-retired... Needs a new covering job...
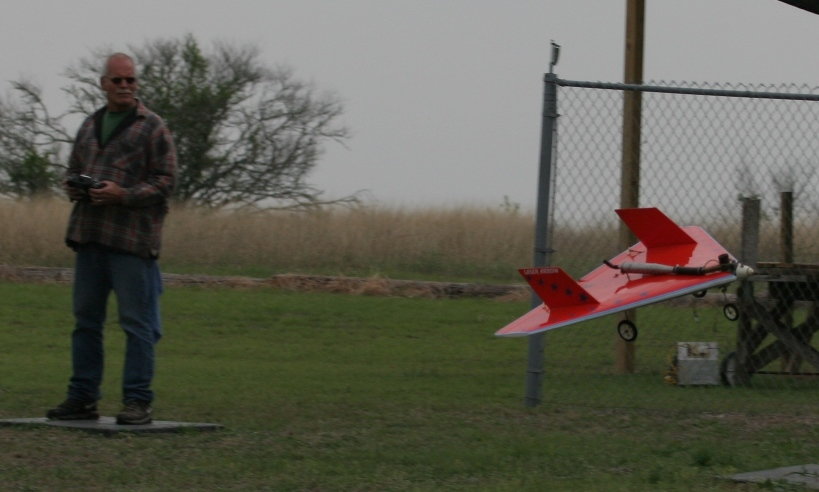
Laser Arrow circa 2011
I put an old OS 45FSR and pipe on it..
I was really surprised at how well this thing flew. Only problem I had was I kept using the rudder stick to slide it around a little. That is wasted motion on this thing except when it's on the ground taxiing..None the less fun to fly. Awkward to get use to watching though. Currently it sets semi-retired... Needs a new covering job...
Laser Arrow circa 2011
 06-06-2023, 01:16 PM
#36
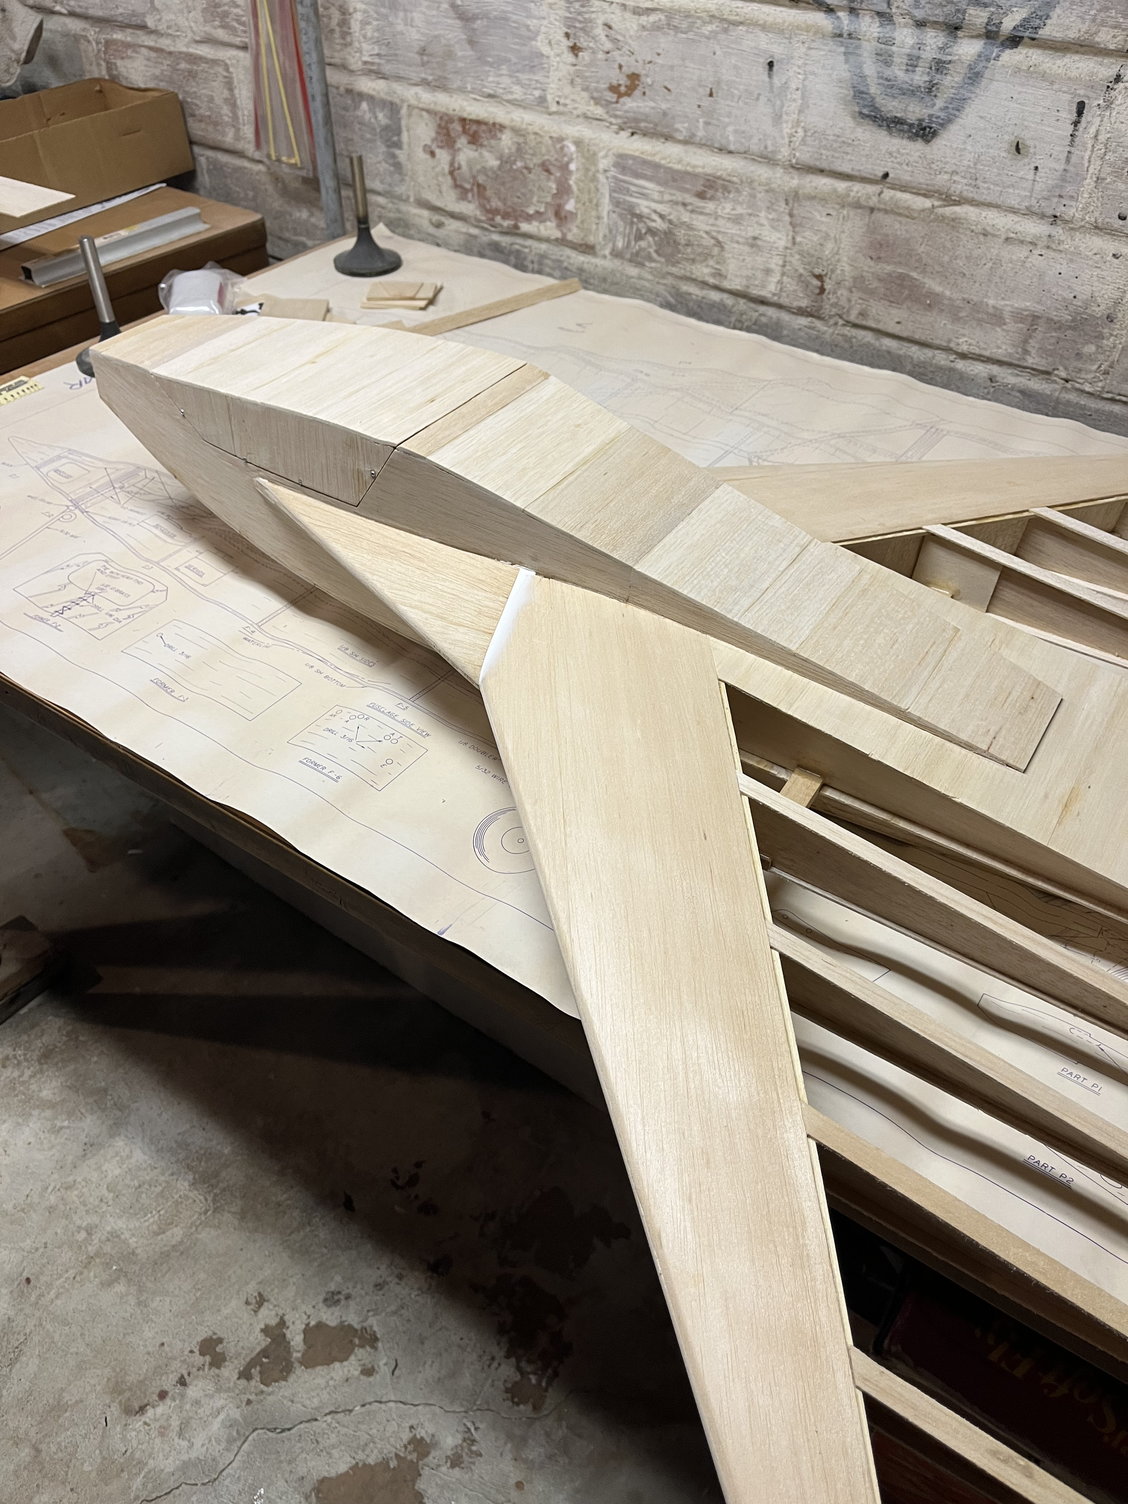
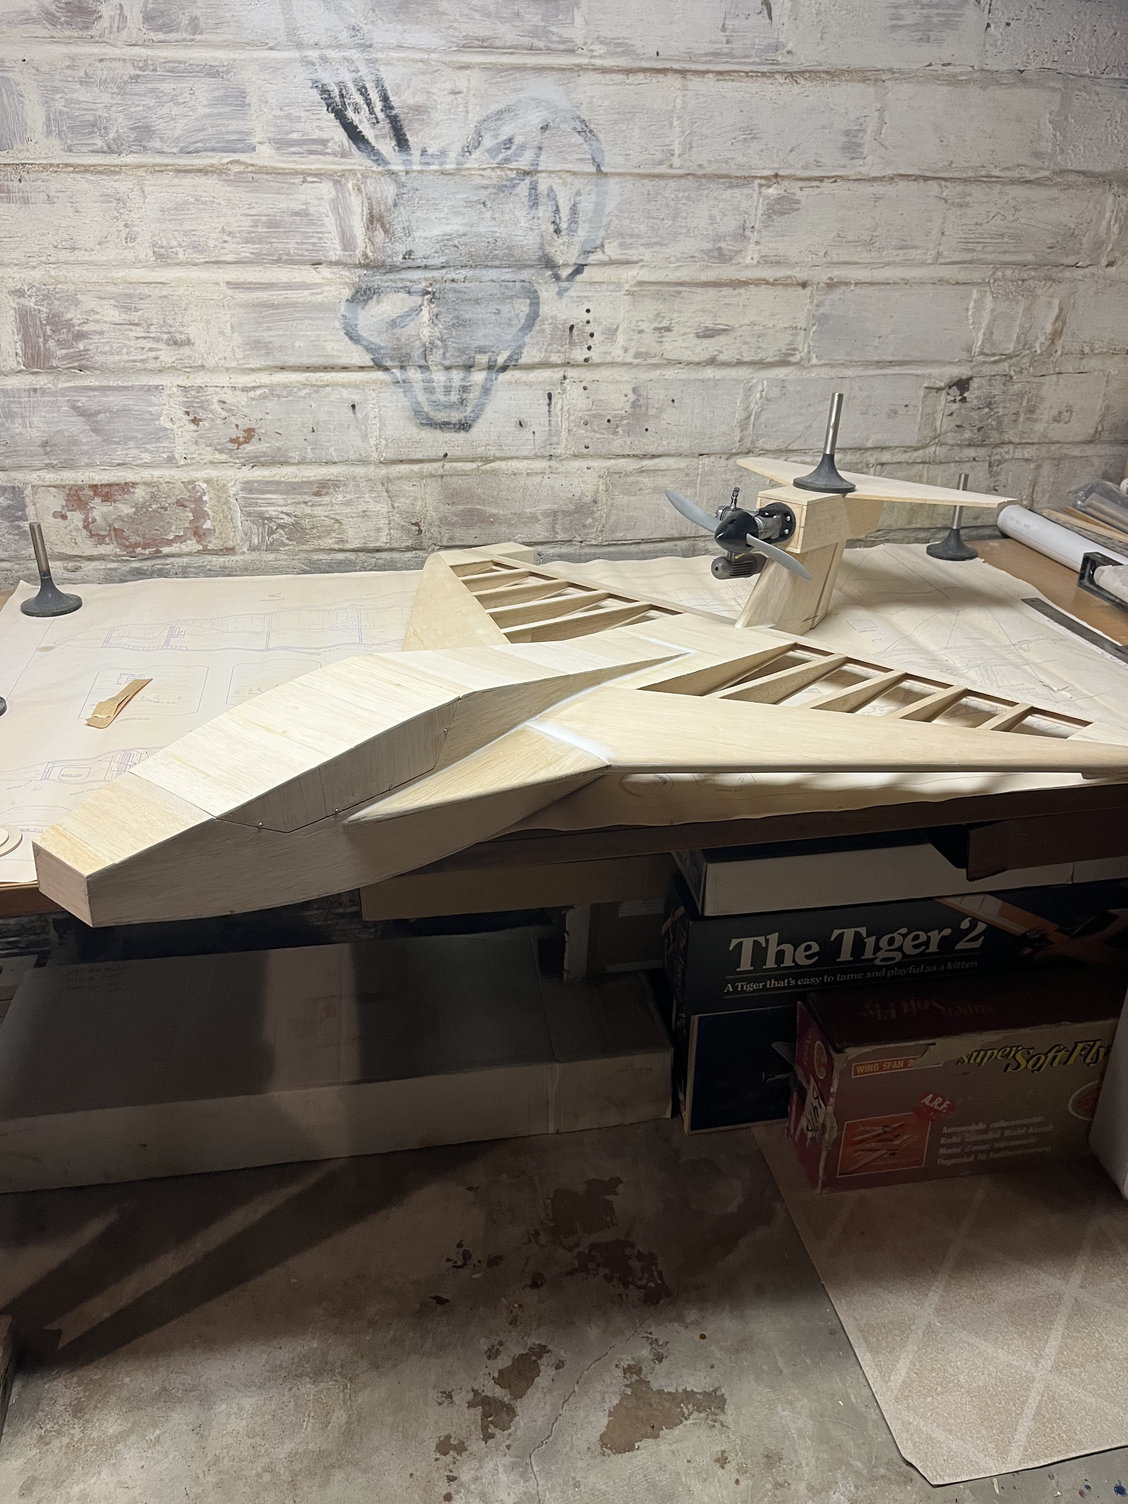
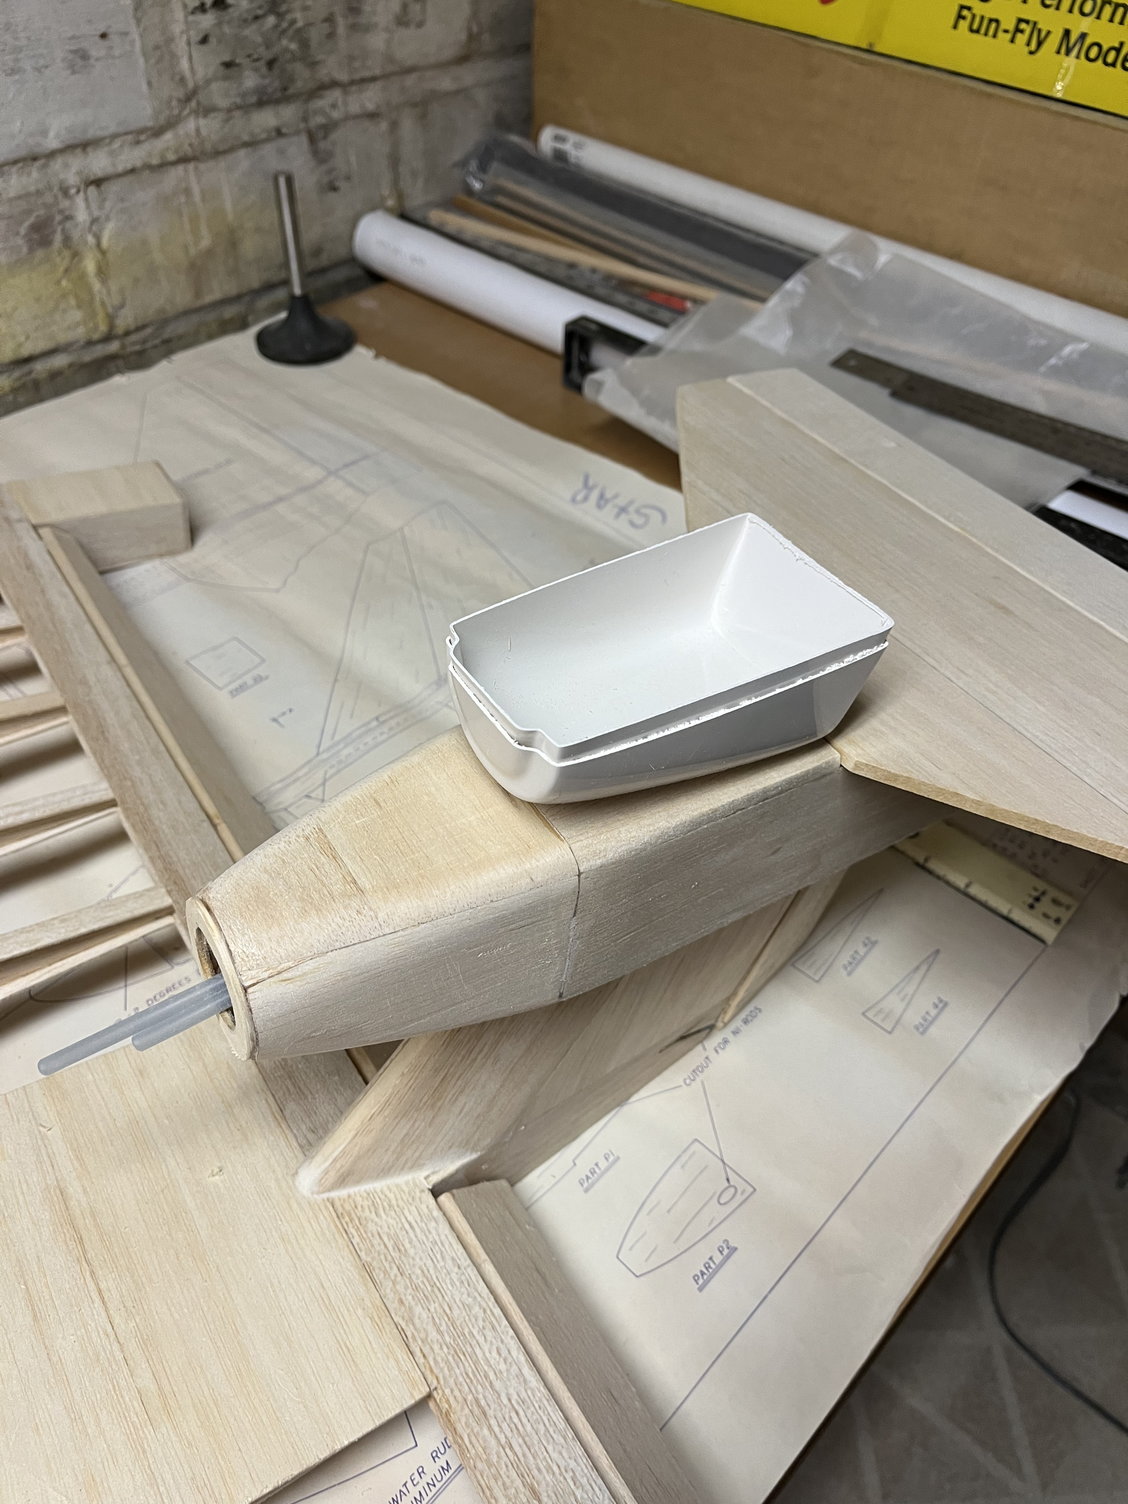
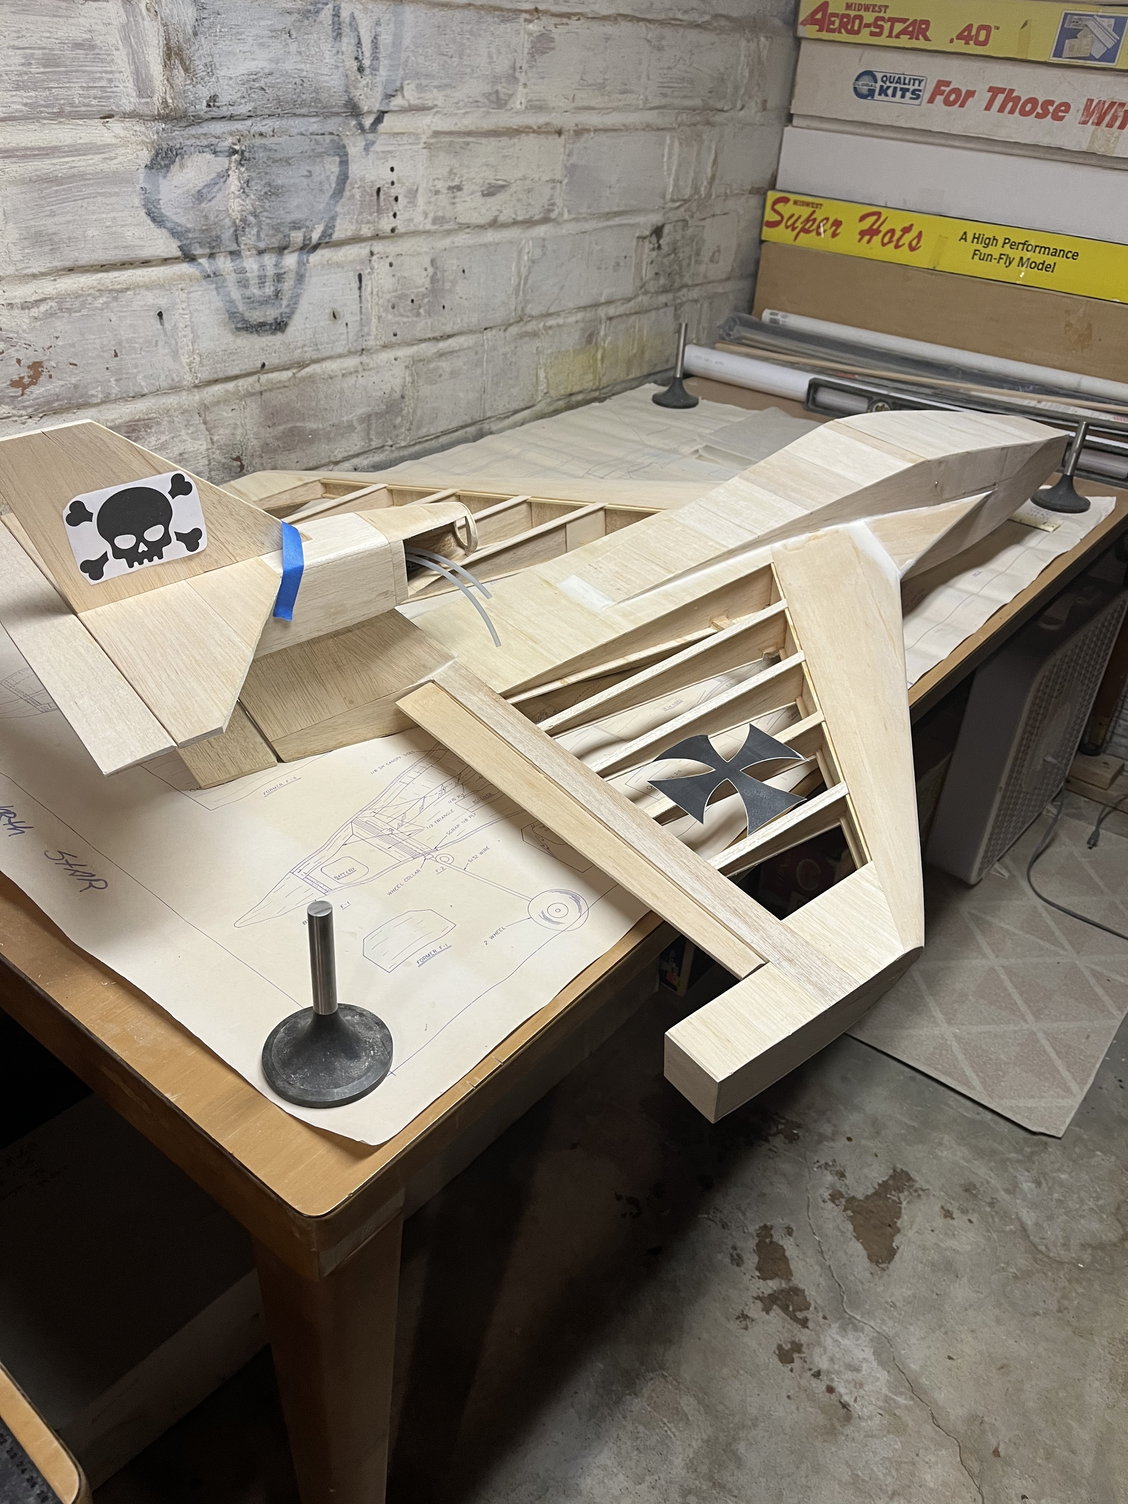
Engine is mounted long enough to get the cowl made and shaped. I’m in a pickle as the only tank I have that fits the pod is only 8 oz. The plans say don’t go over a 10 oz but I want a 12 oz if it will fit. I have to drive to the hobby shop which will take most of the day before I can really move forward. I just don’t want to use a cheap plastic cowl or a dinky tank. Once I get this pod done I can start covering some pieces and keep moving…….
Last edited by plumberdeluxe; 06-06-2023 at 03:09 PM.
06-06-2023, 05:30 PM
#37
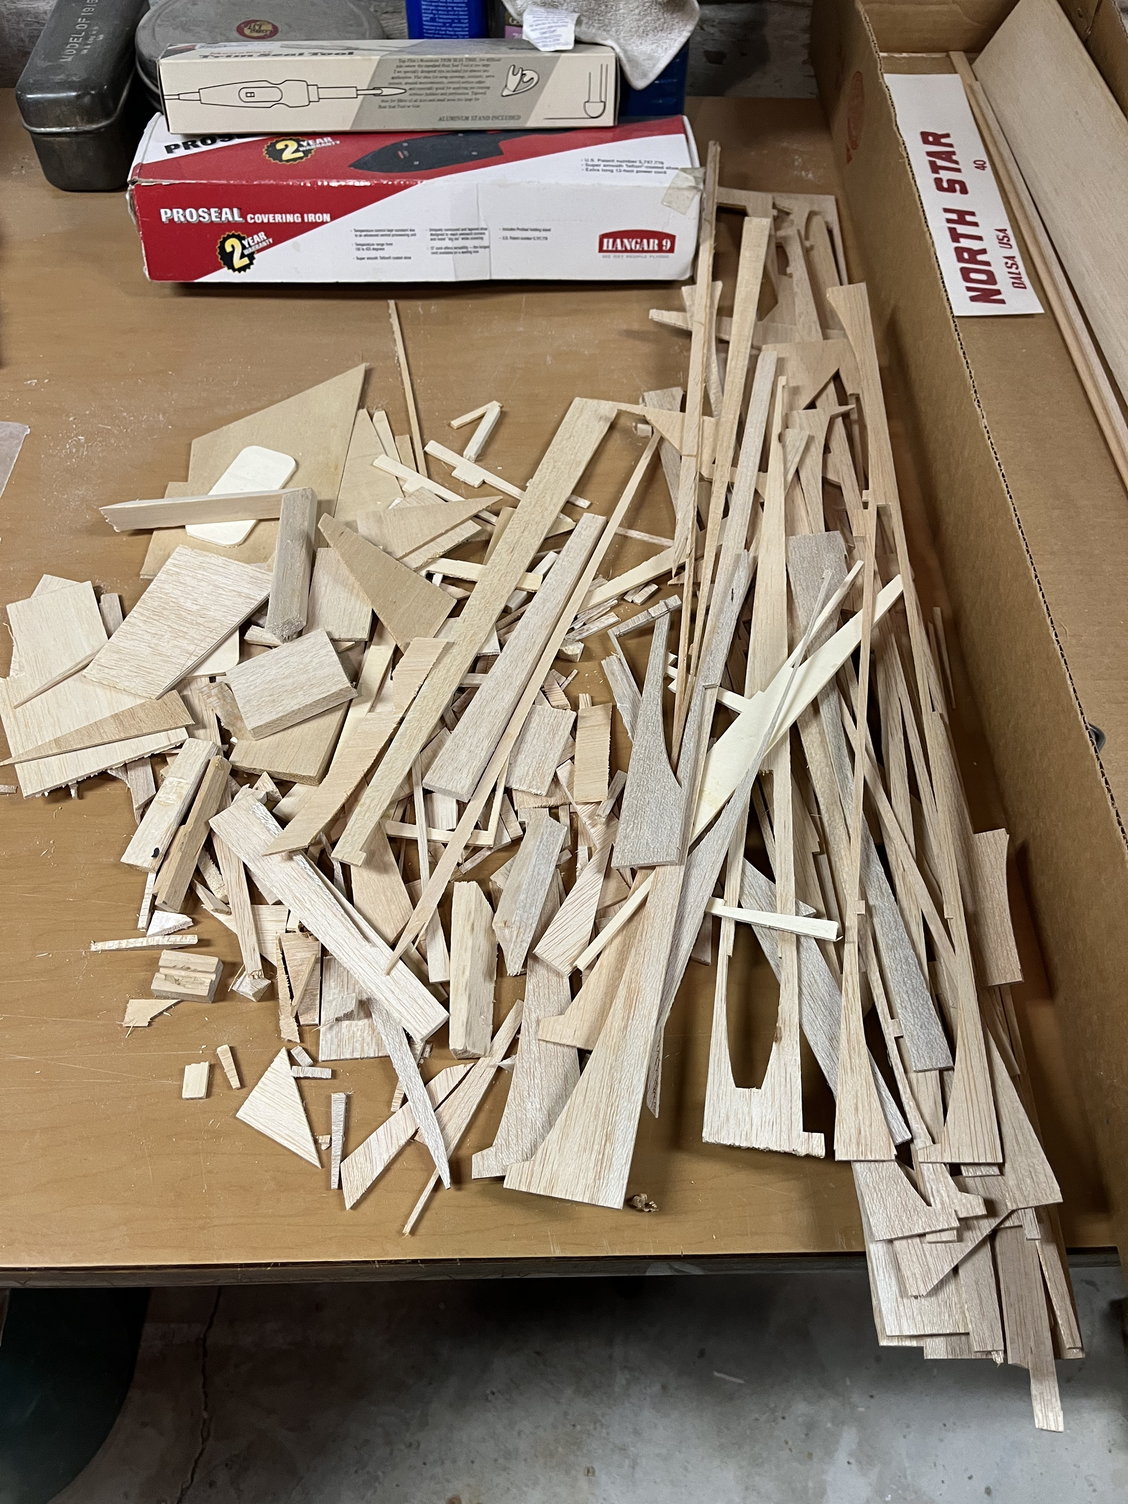
Here is the winglet installed but not filled or sanded. I will do all the filling at once but not quite yet. The box is almost empty and the scrap pile is getting bigger. I’ll hit the hobby shop tomorrow and get my tank and a few other goodies. I think I have an idea for the covering scheme, so I’ll keep working on that also. Getting close………
06-07-2023, 05:23 AM
#38
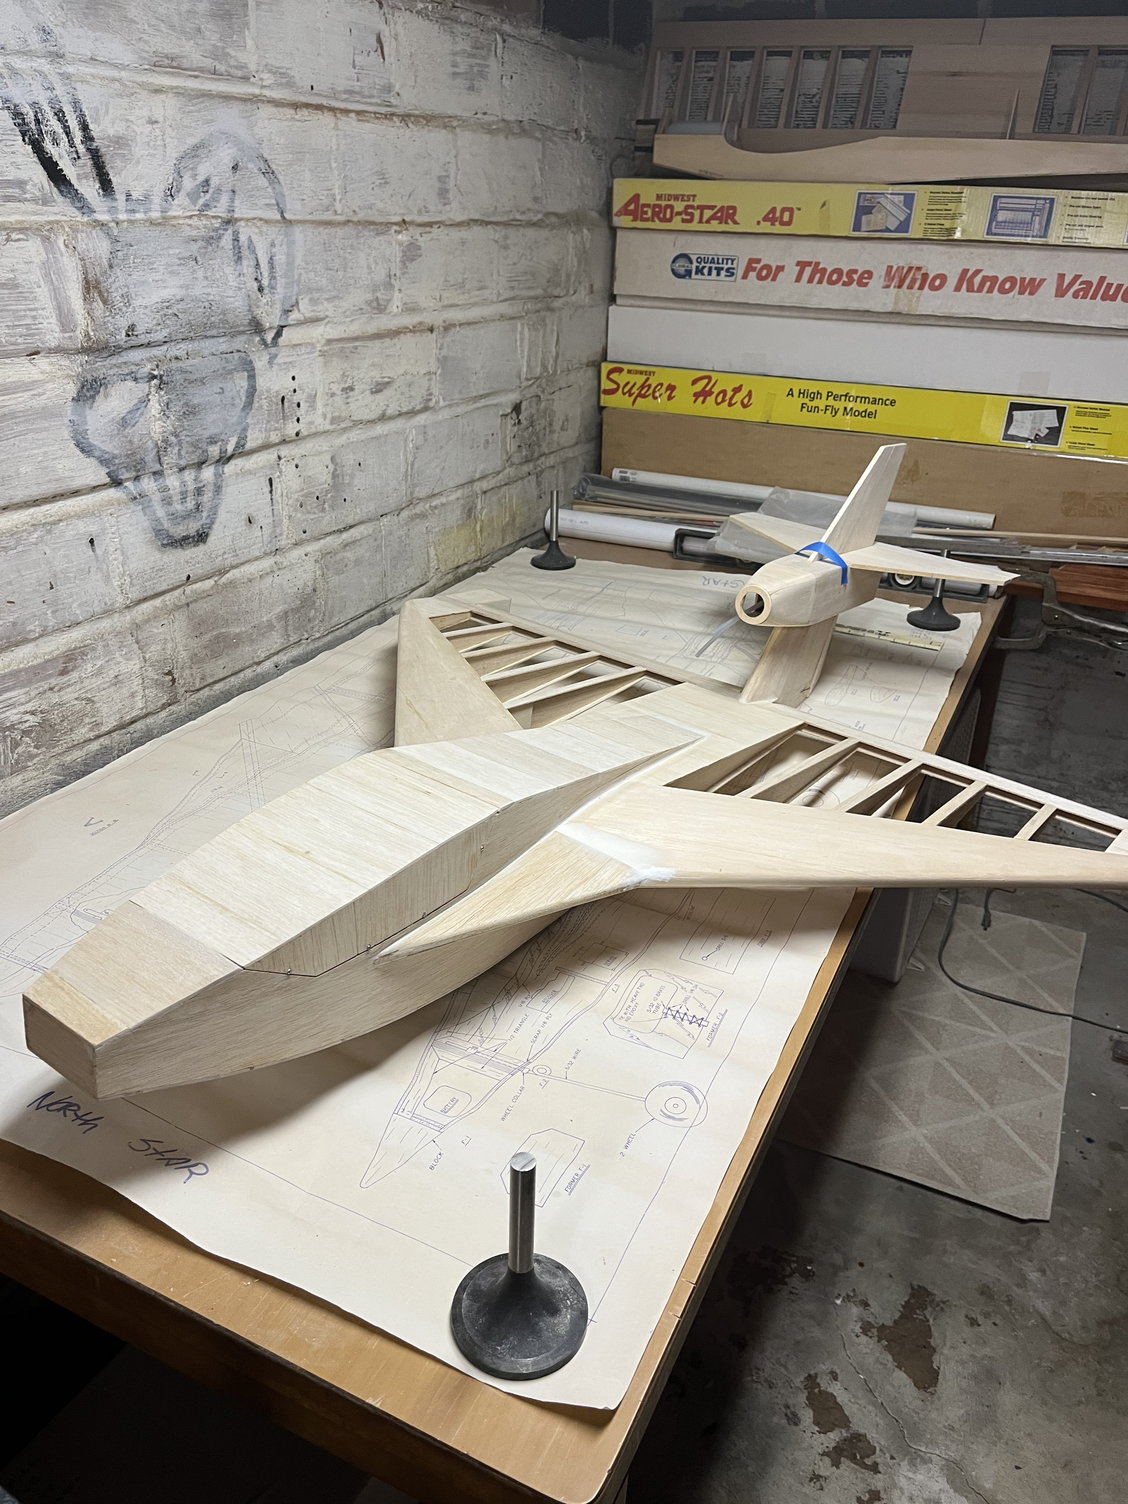
At this point almost all of the assembly is done with the exception of building an engine pod cowl instead of using the plastic thing in the kit. I’m going to get a proper tank today and the 3 remaining pieces (tail feathers) of balsa can be added. I’ll move from an assembly mode to a finish mode and prep the rig for covering. Things most likely will slow down as prep and covering a built plane takes more time than a component or two. Hang tight, this thing will be in the water soon…….
 06-08-2023, 02:54 PM
#40
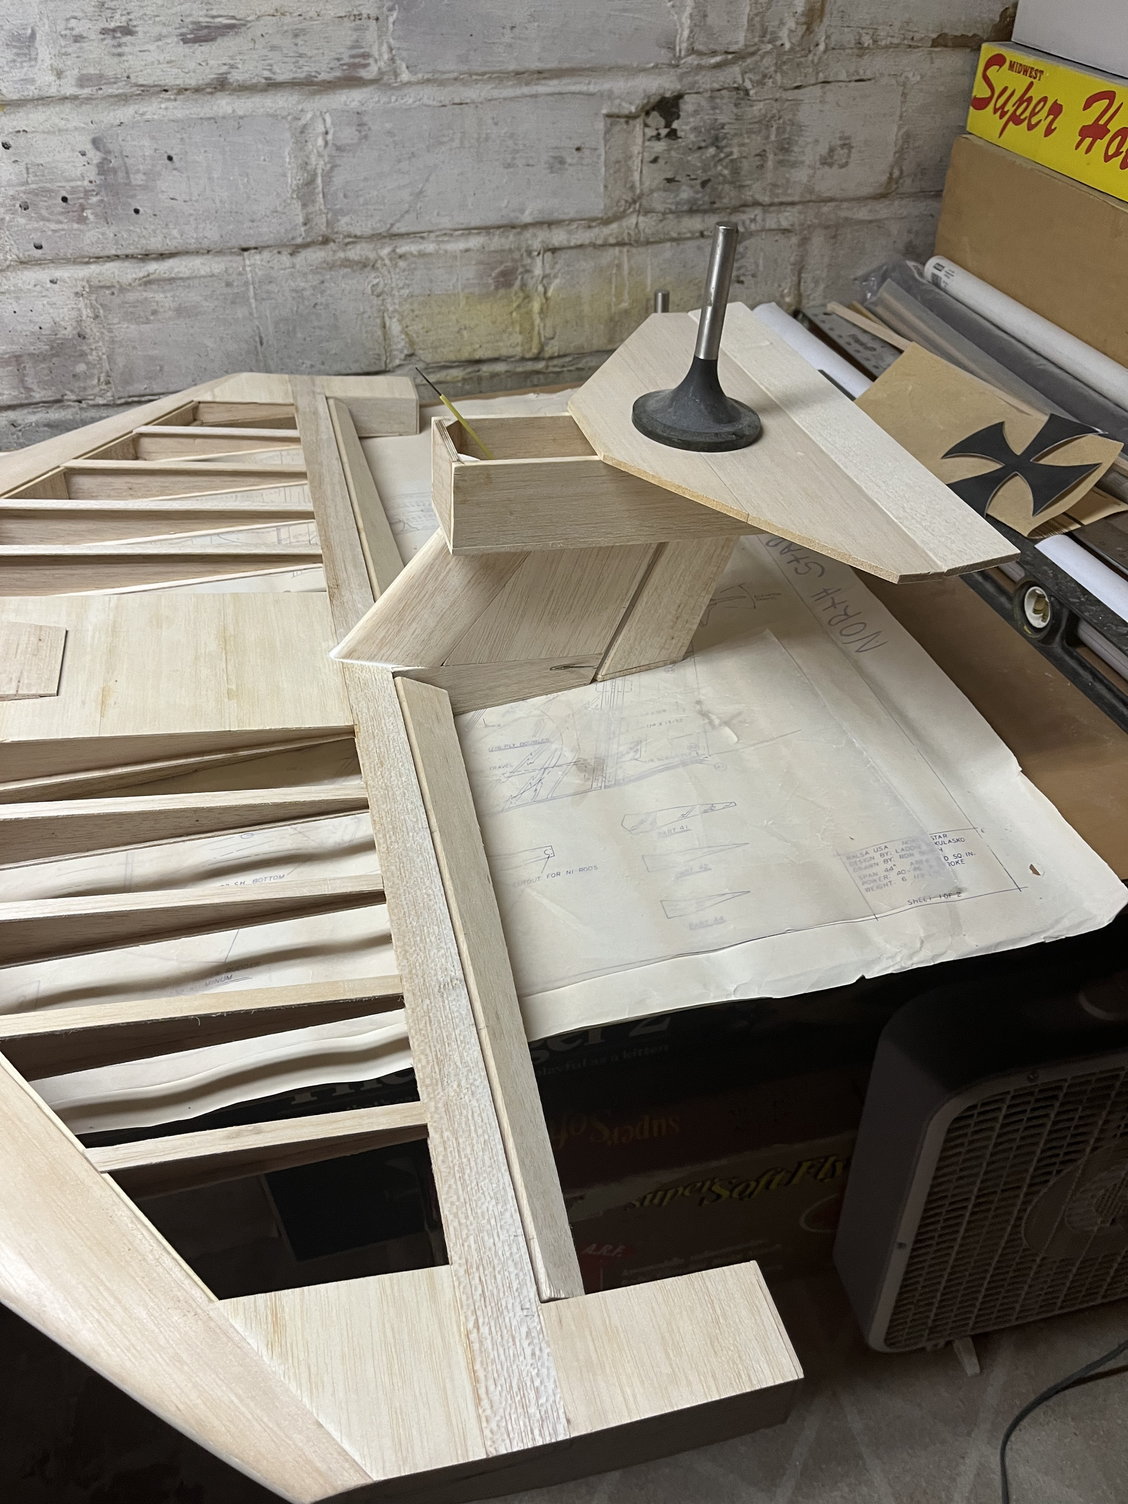
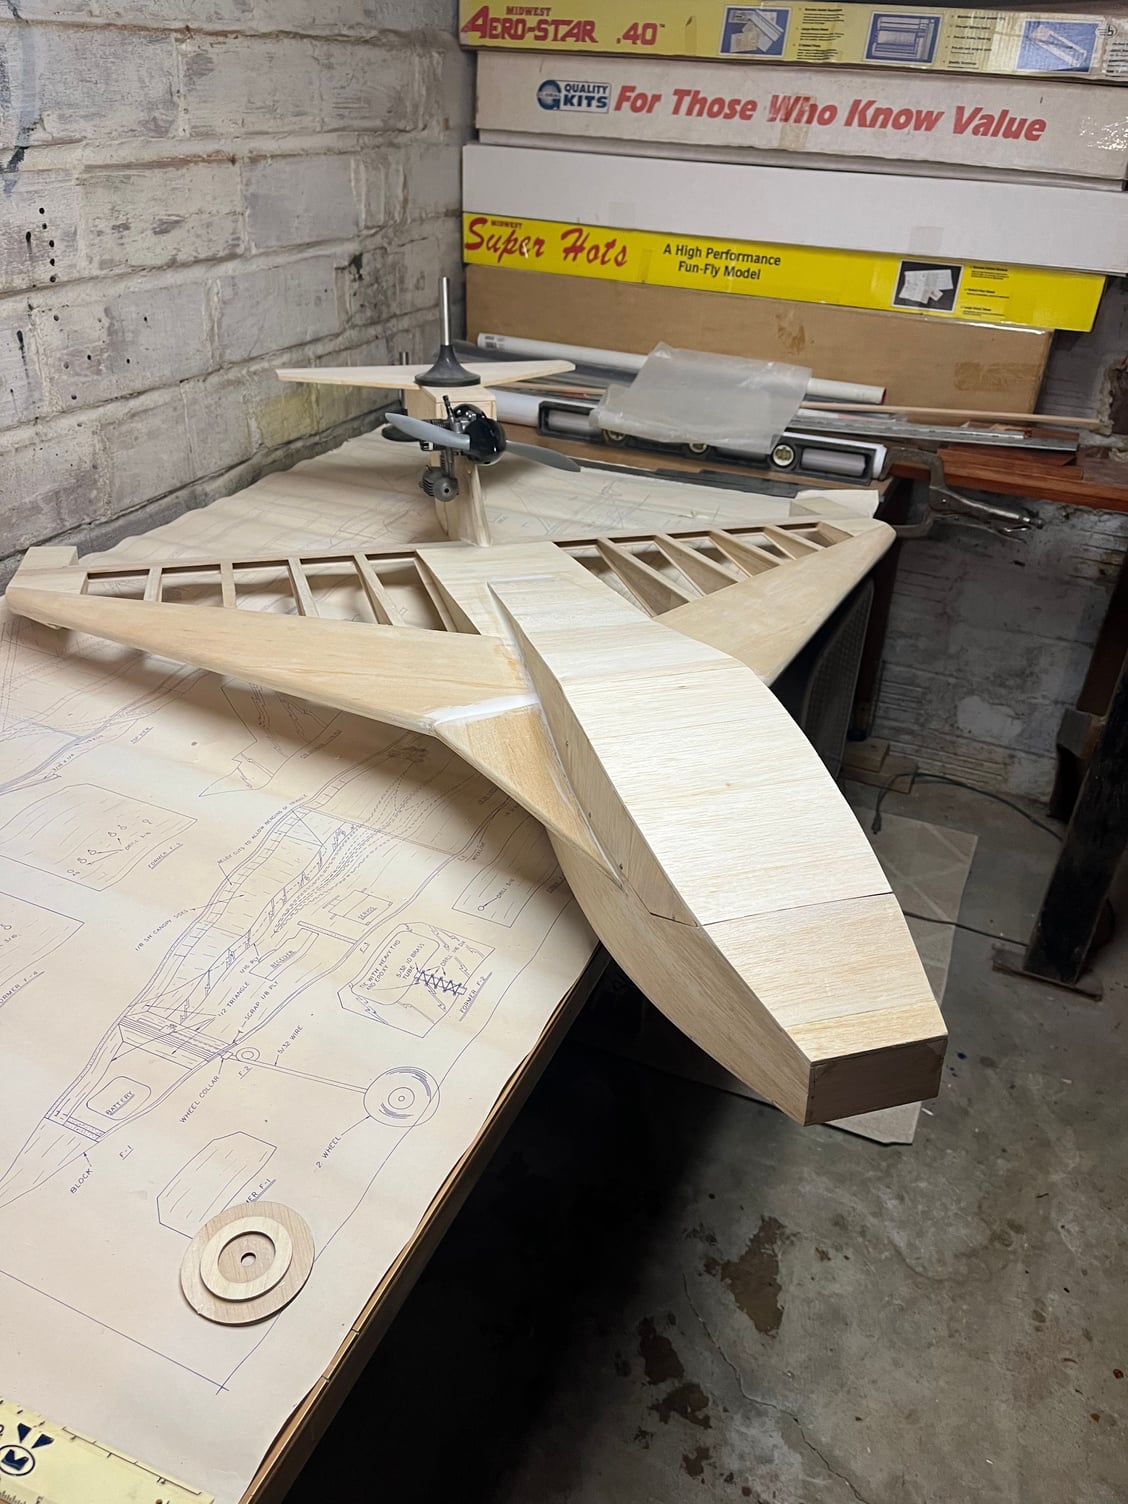
Here is the engine pod roughed in, I think this will be better than some plastic thing. Everything fits and I did get a 12 oz tank installed. I’m going against what the plans state to use, guess I’ll put the c/g farthest forward and have plenty of fuel to make several passes if I get into a mess. I think it will be fine, first flight should show any weirdness. I purposely am leaving the nose block off until last thing in case weight should be needed……….
06-08-2023, 05:41 PM
#41
Well the construction is near complete and I have been able to make a few decent changes to the design with very few issues. Overall I’m happy with how things have went so far. These deltas are really unique and a fun change from most kits we all tend to build. The thing should last for years flown wisely. I’m ready to start to get some color on it. I have an idea that may look good…..
06-10-2023, 08:30 AM
#42
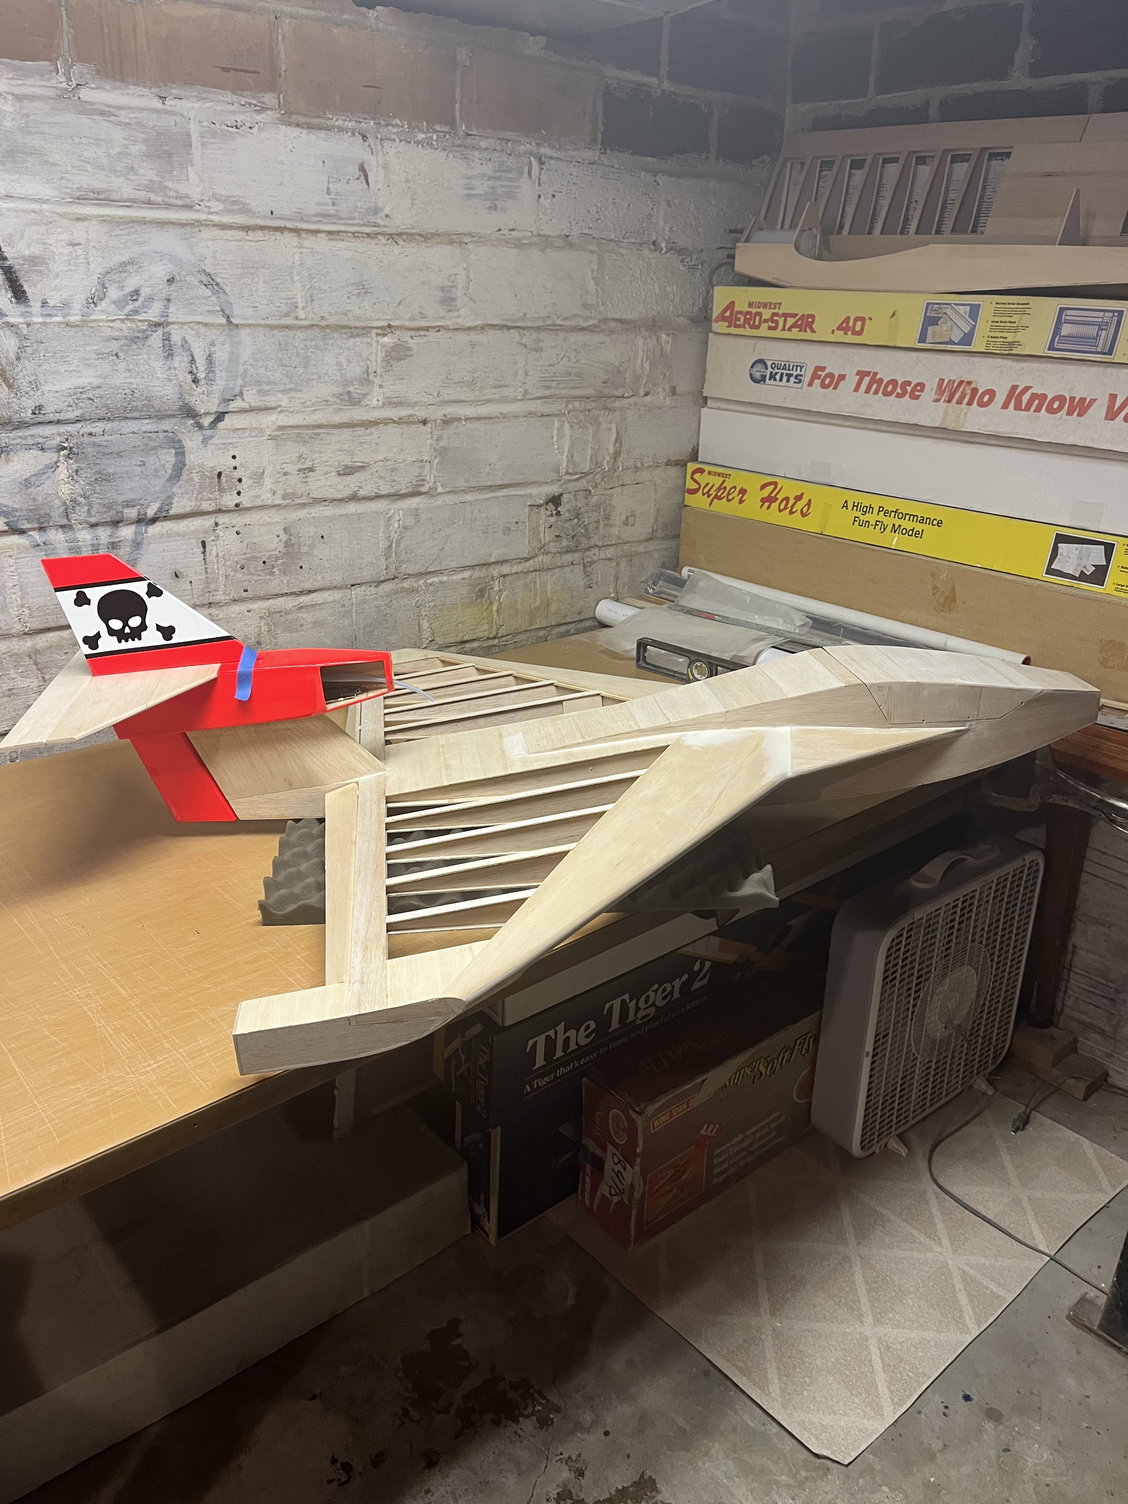
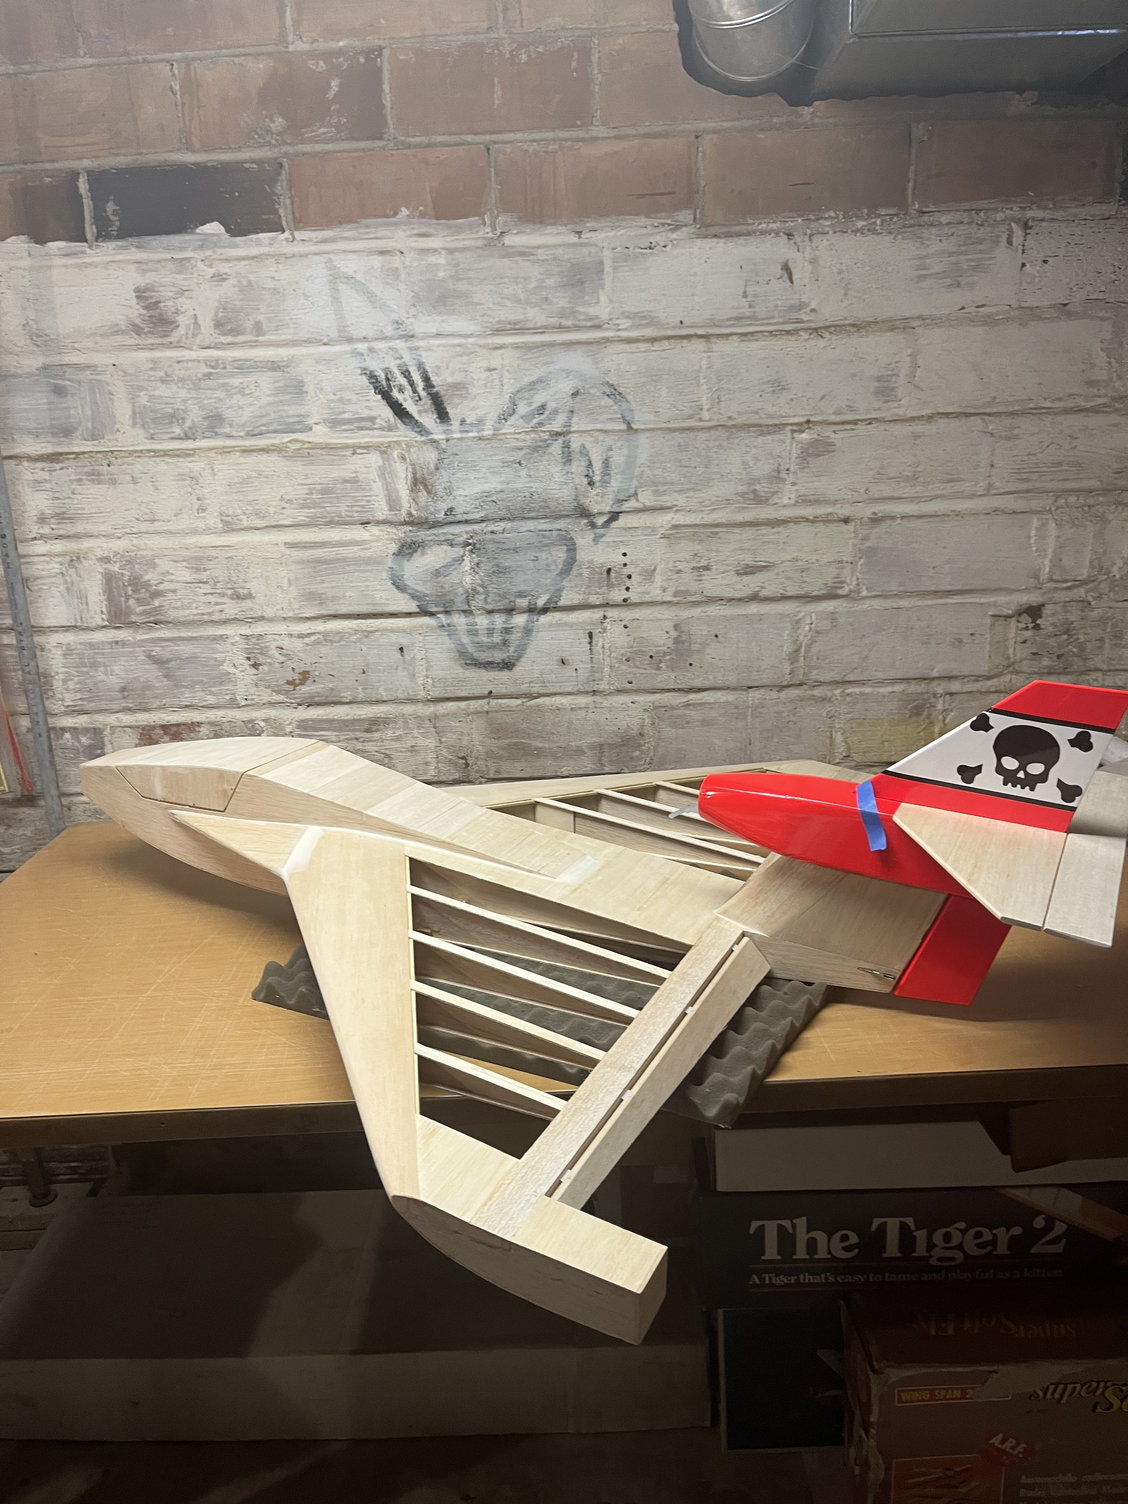
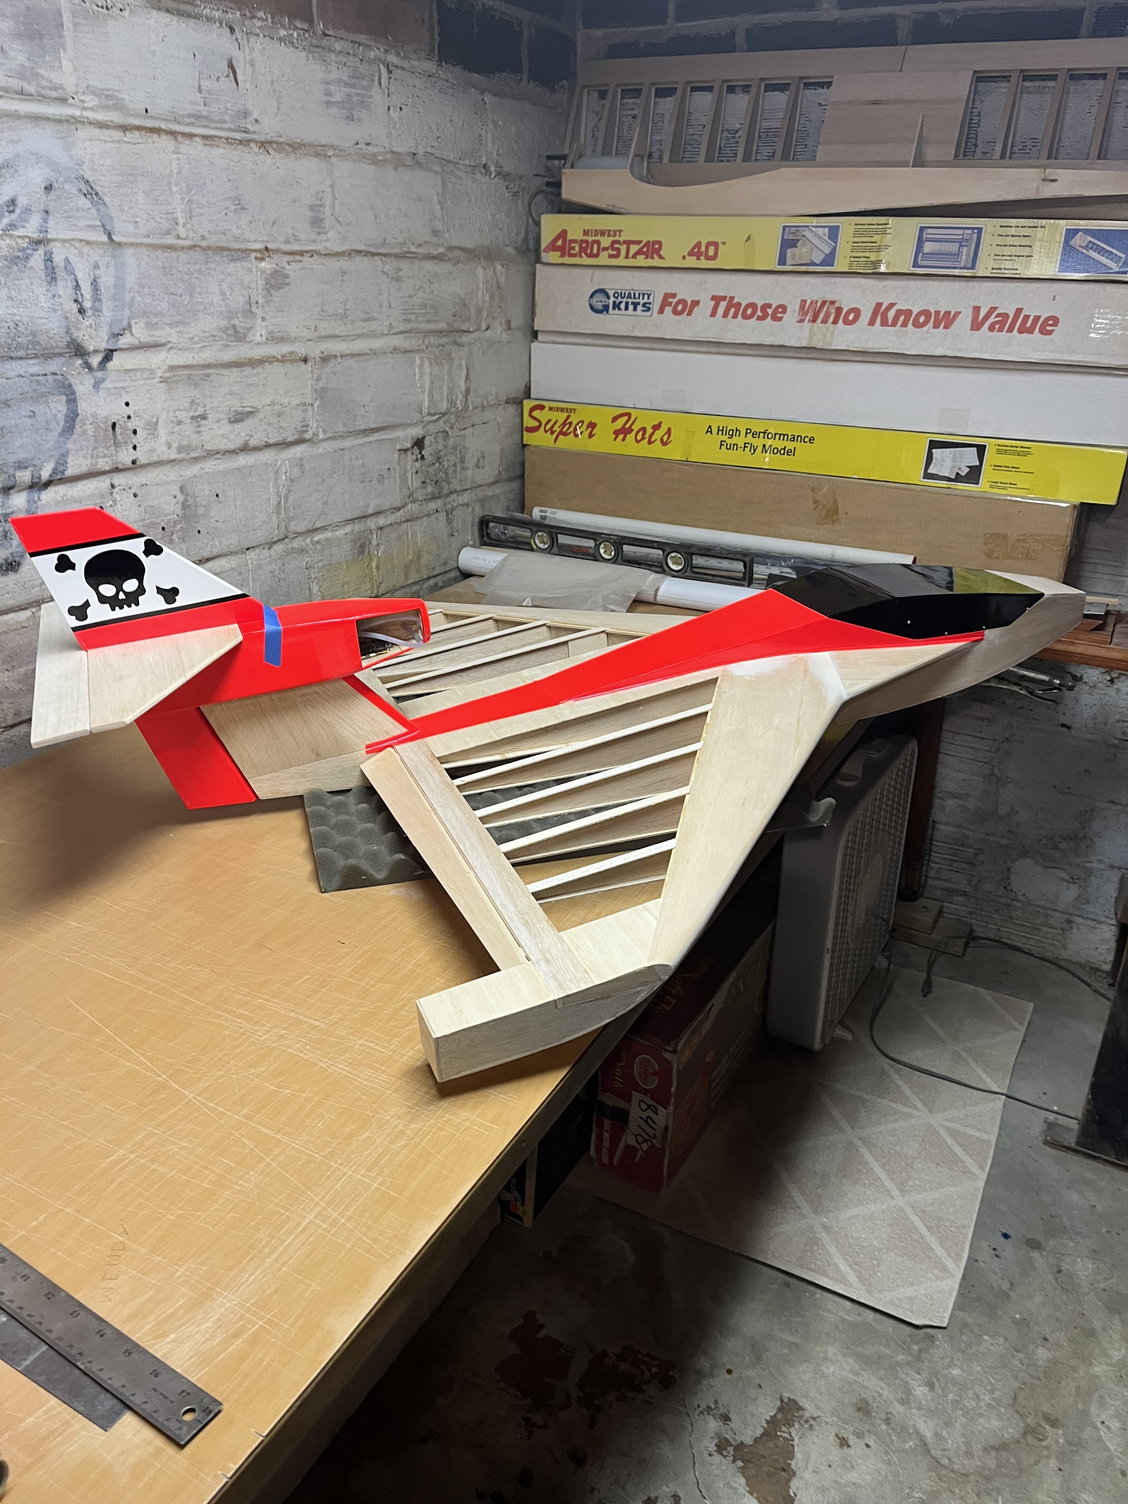
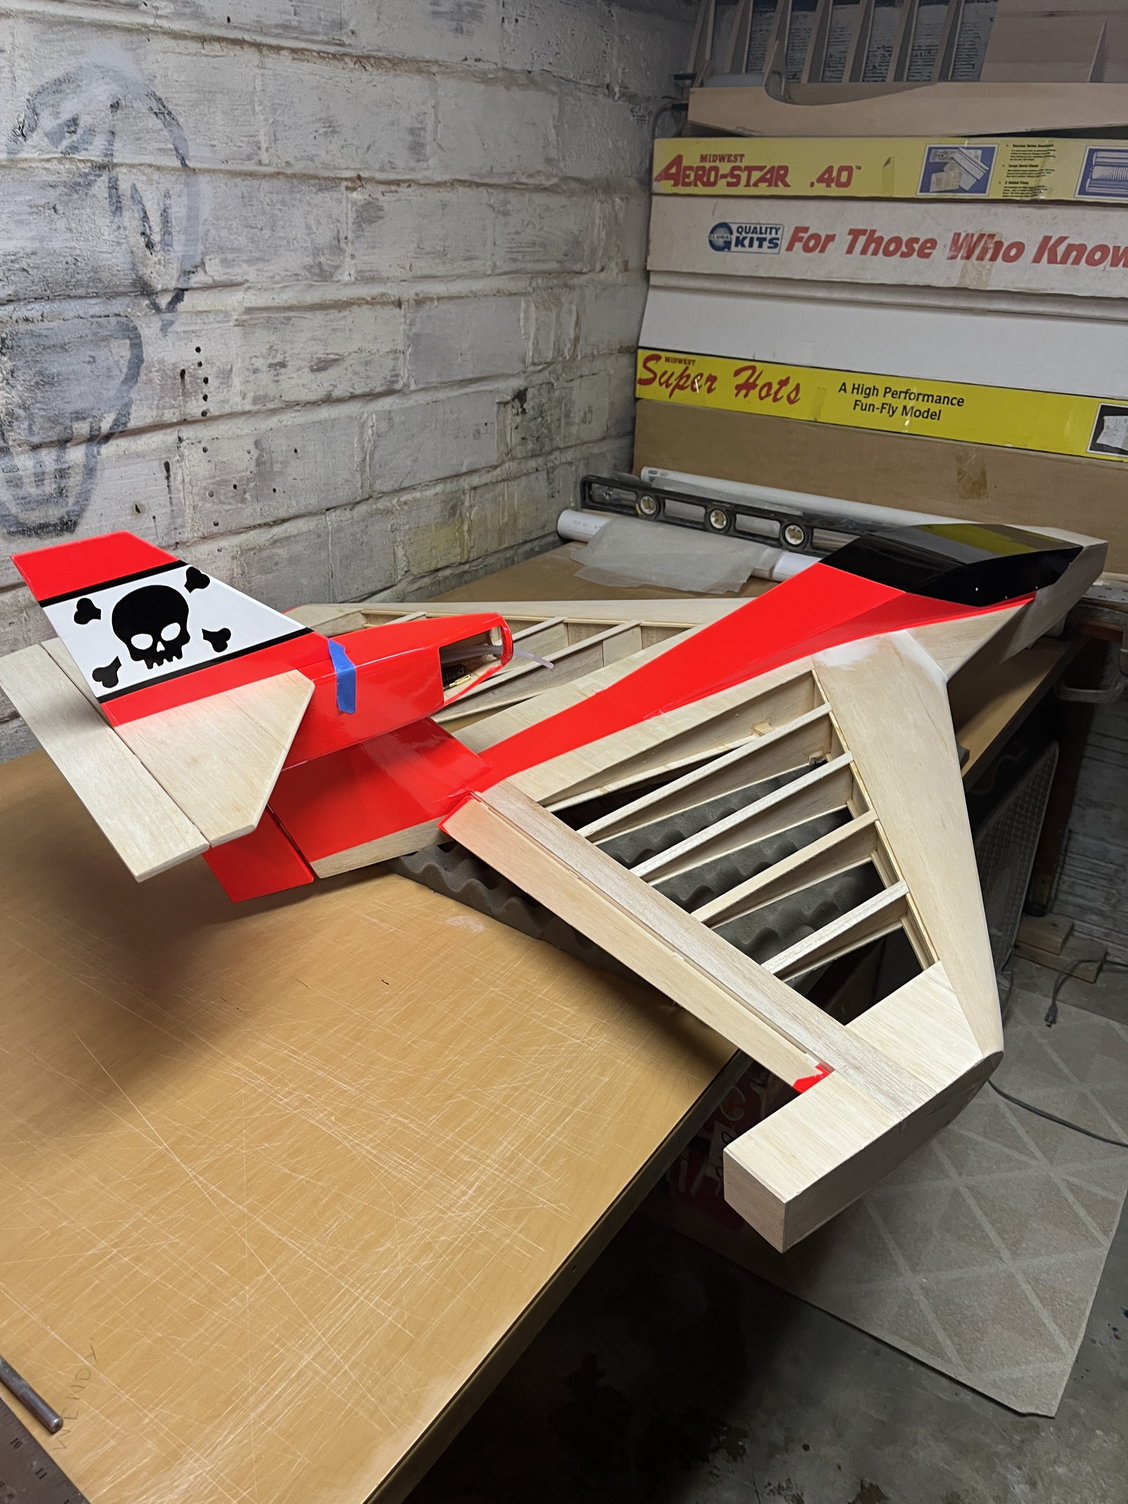
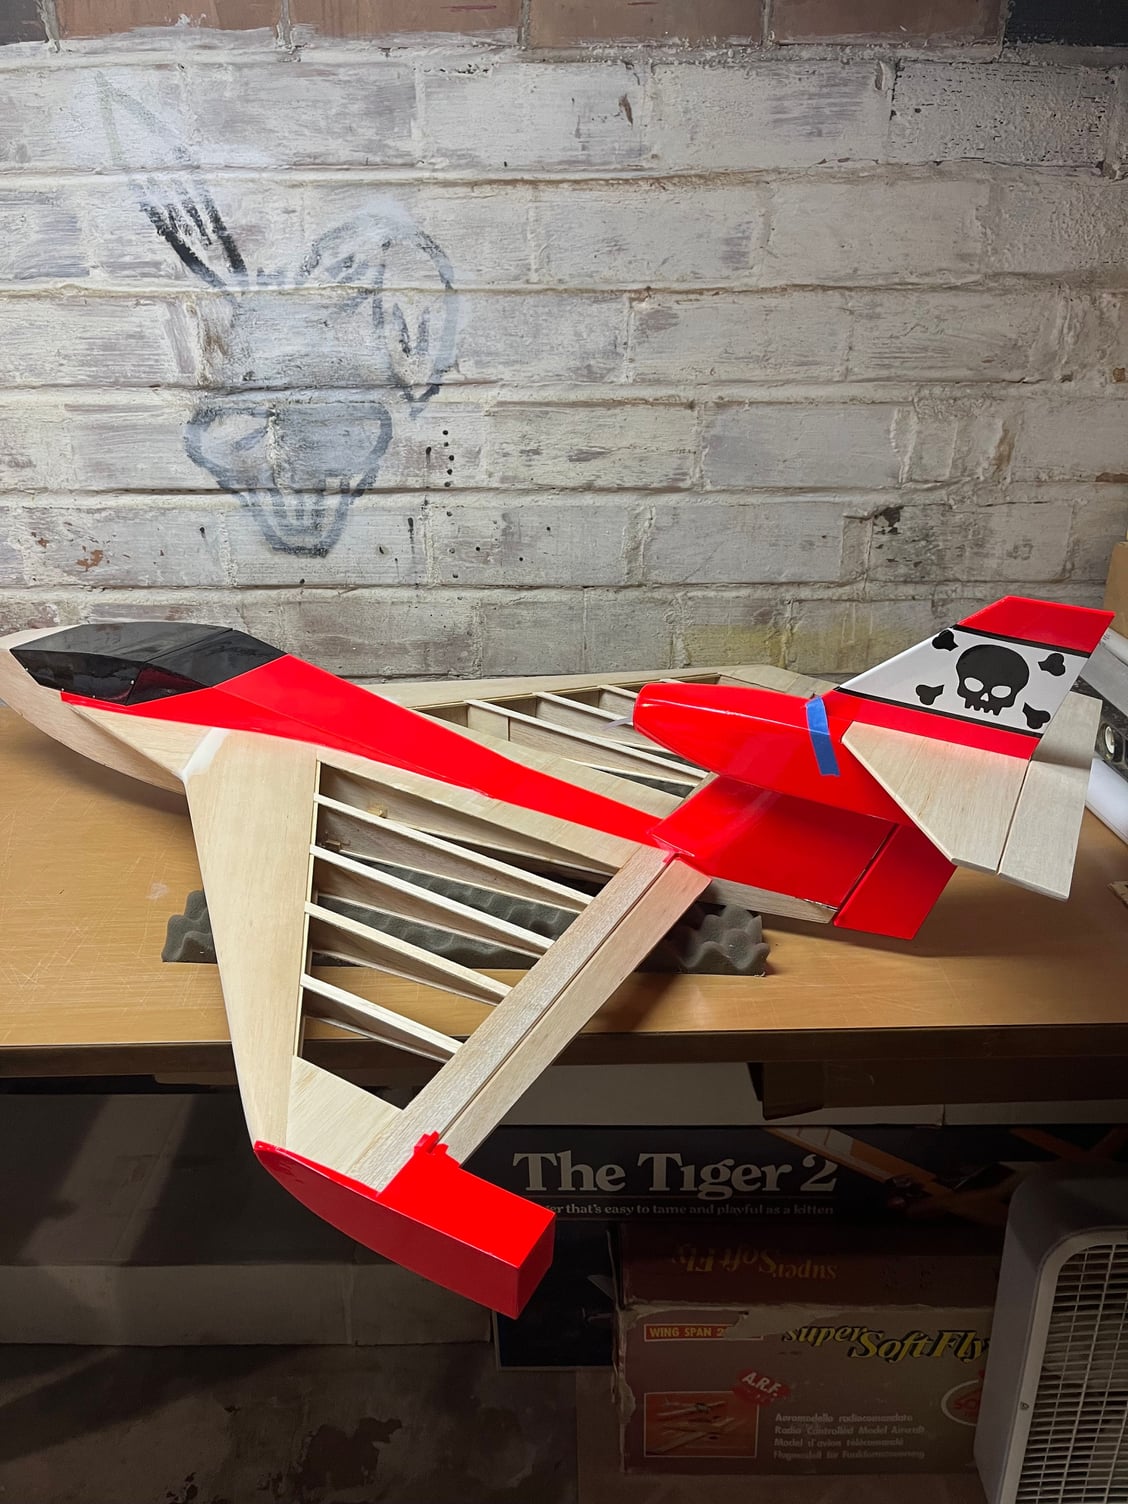
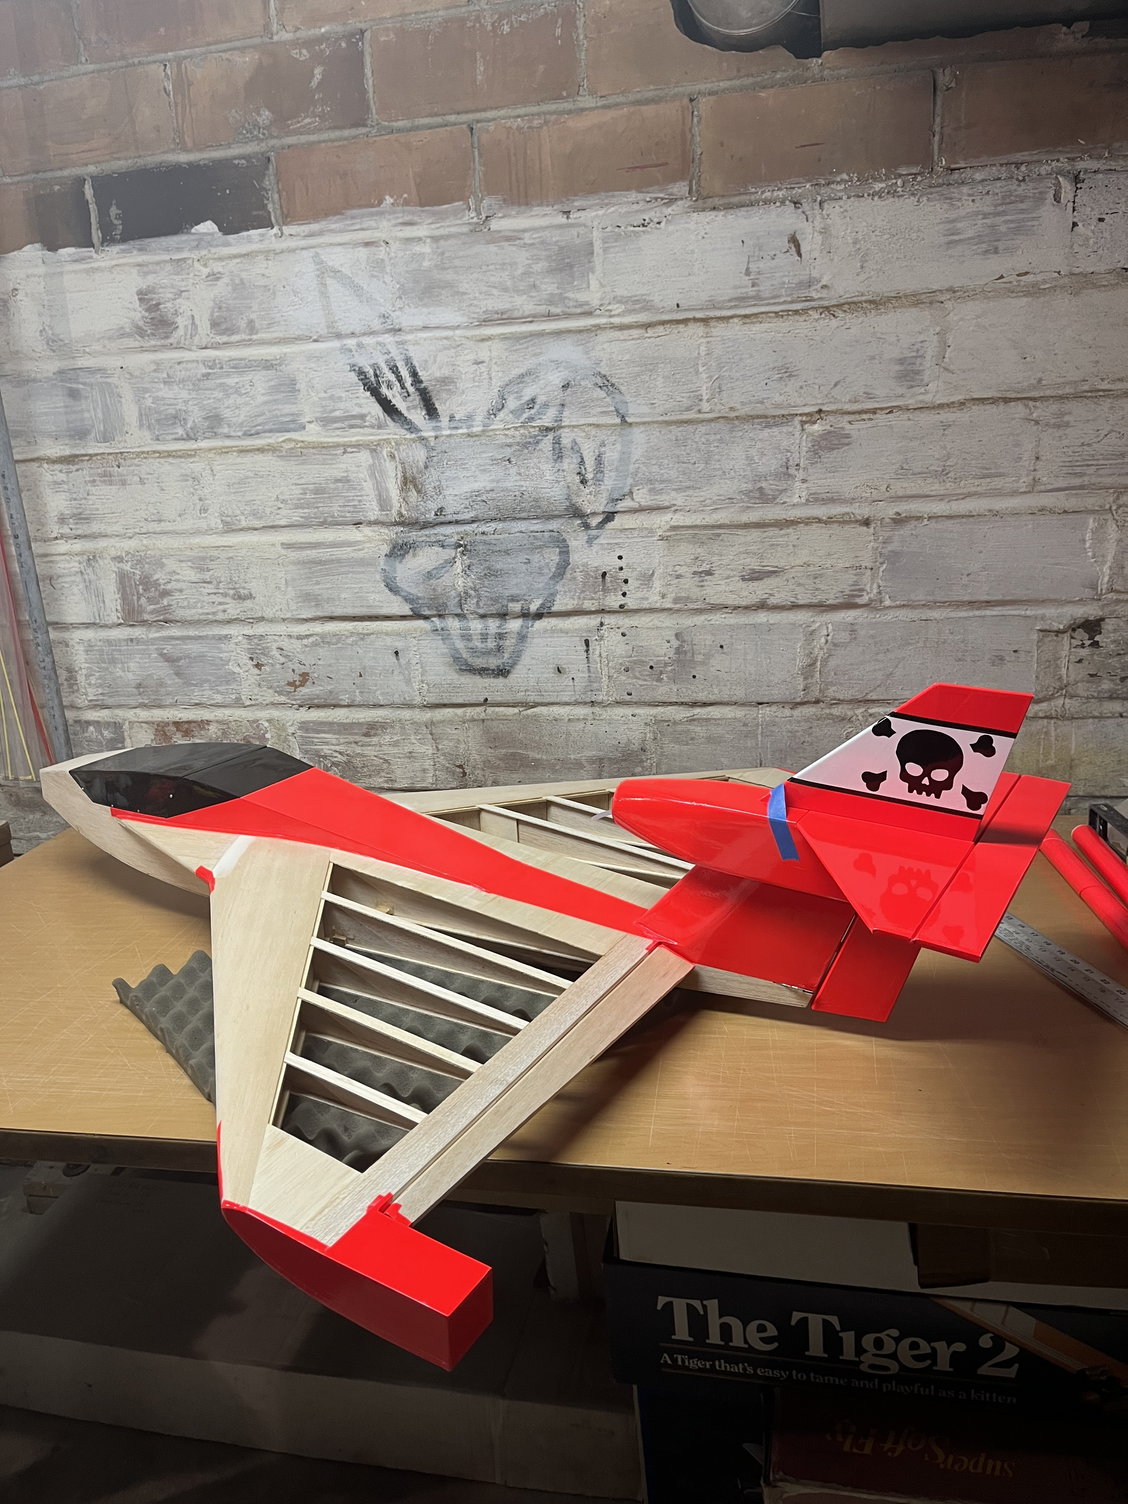
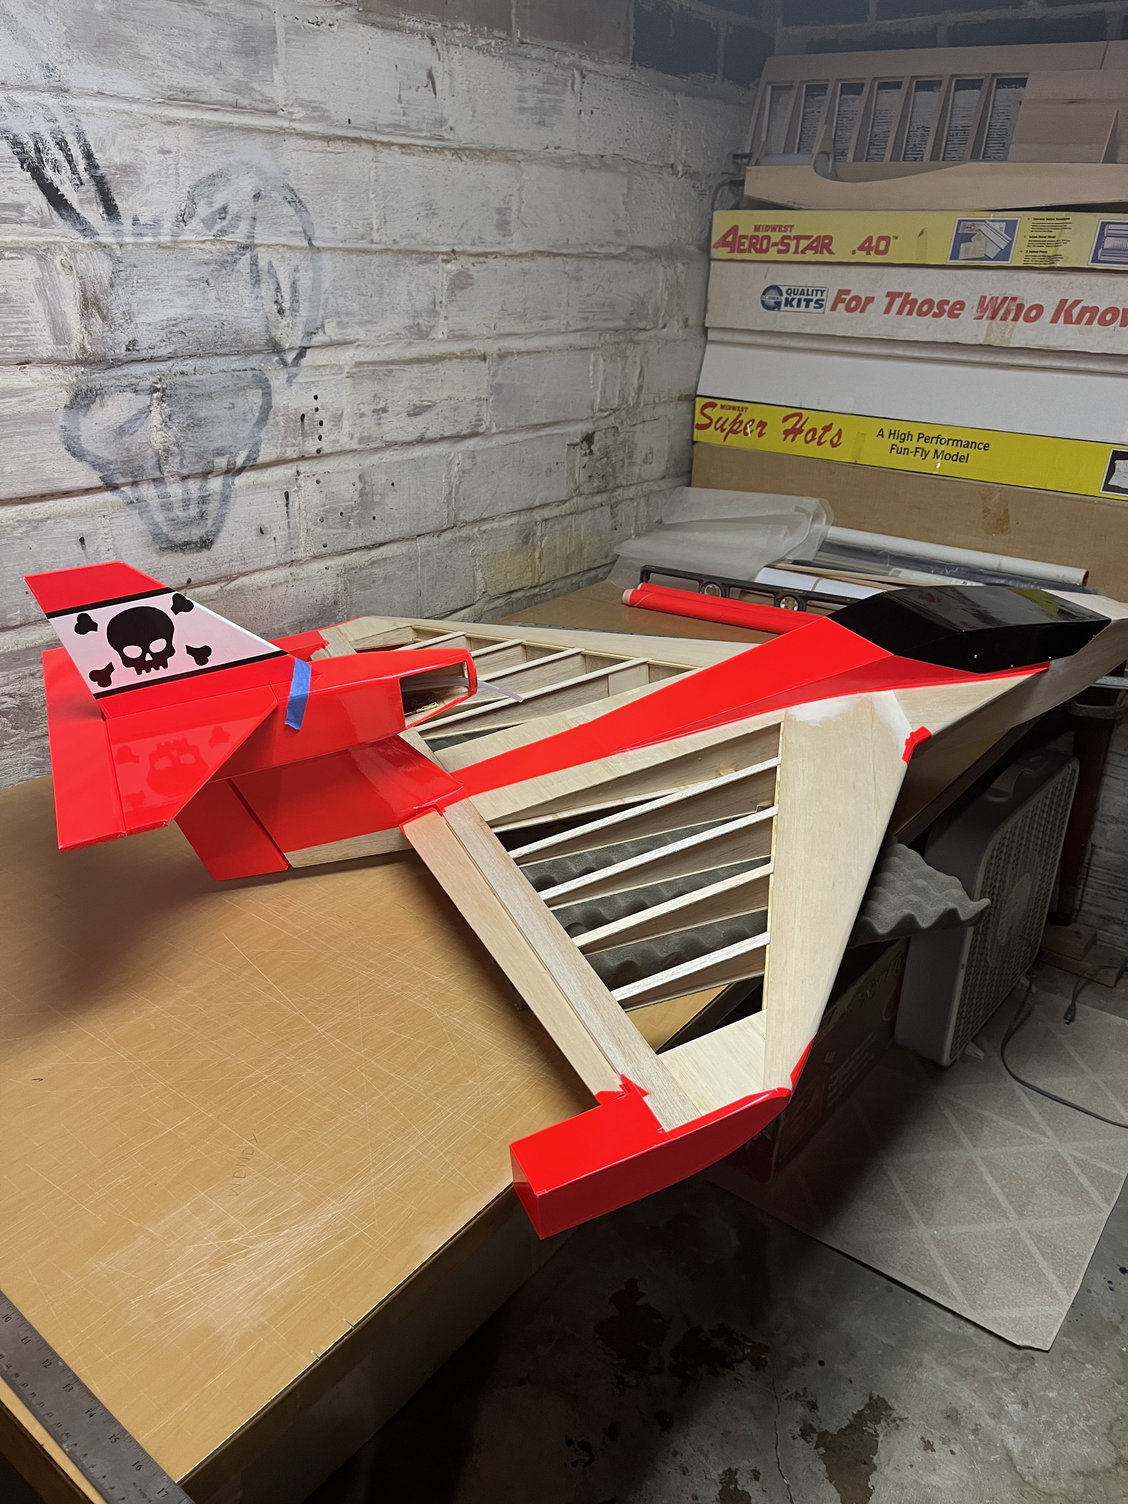
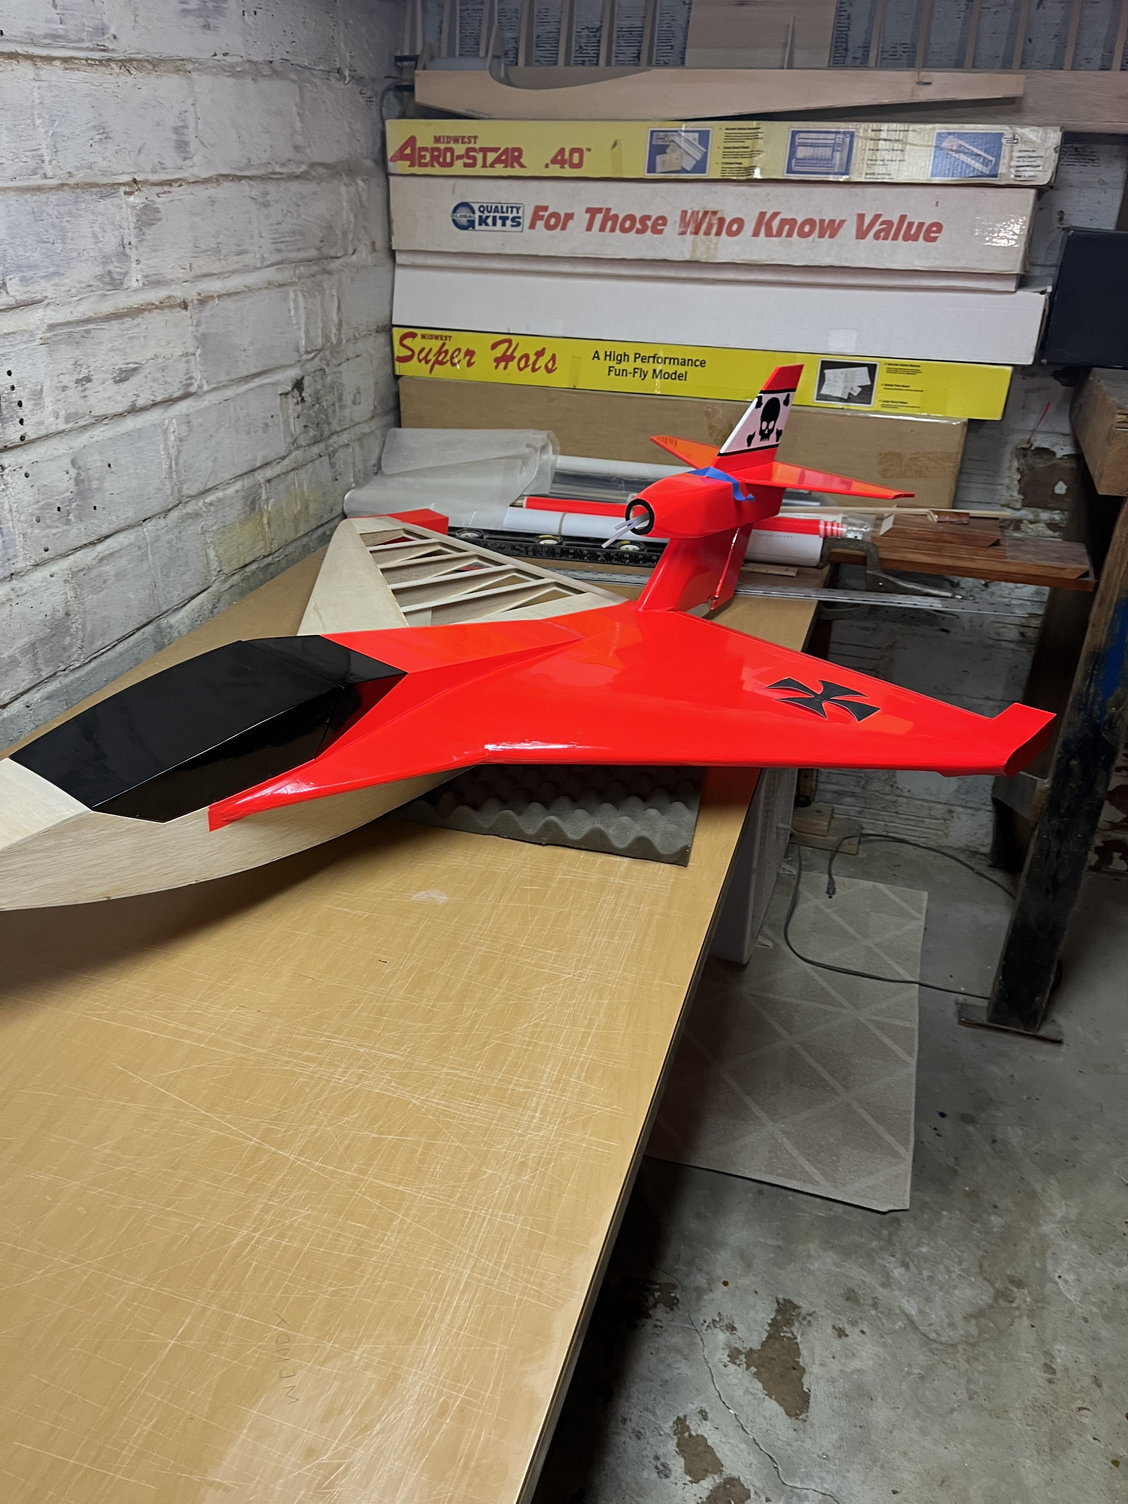
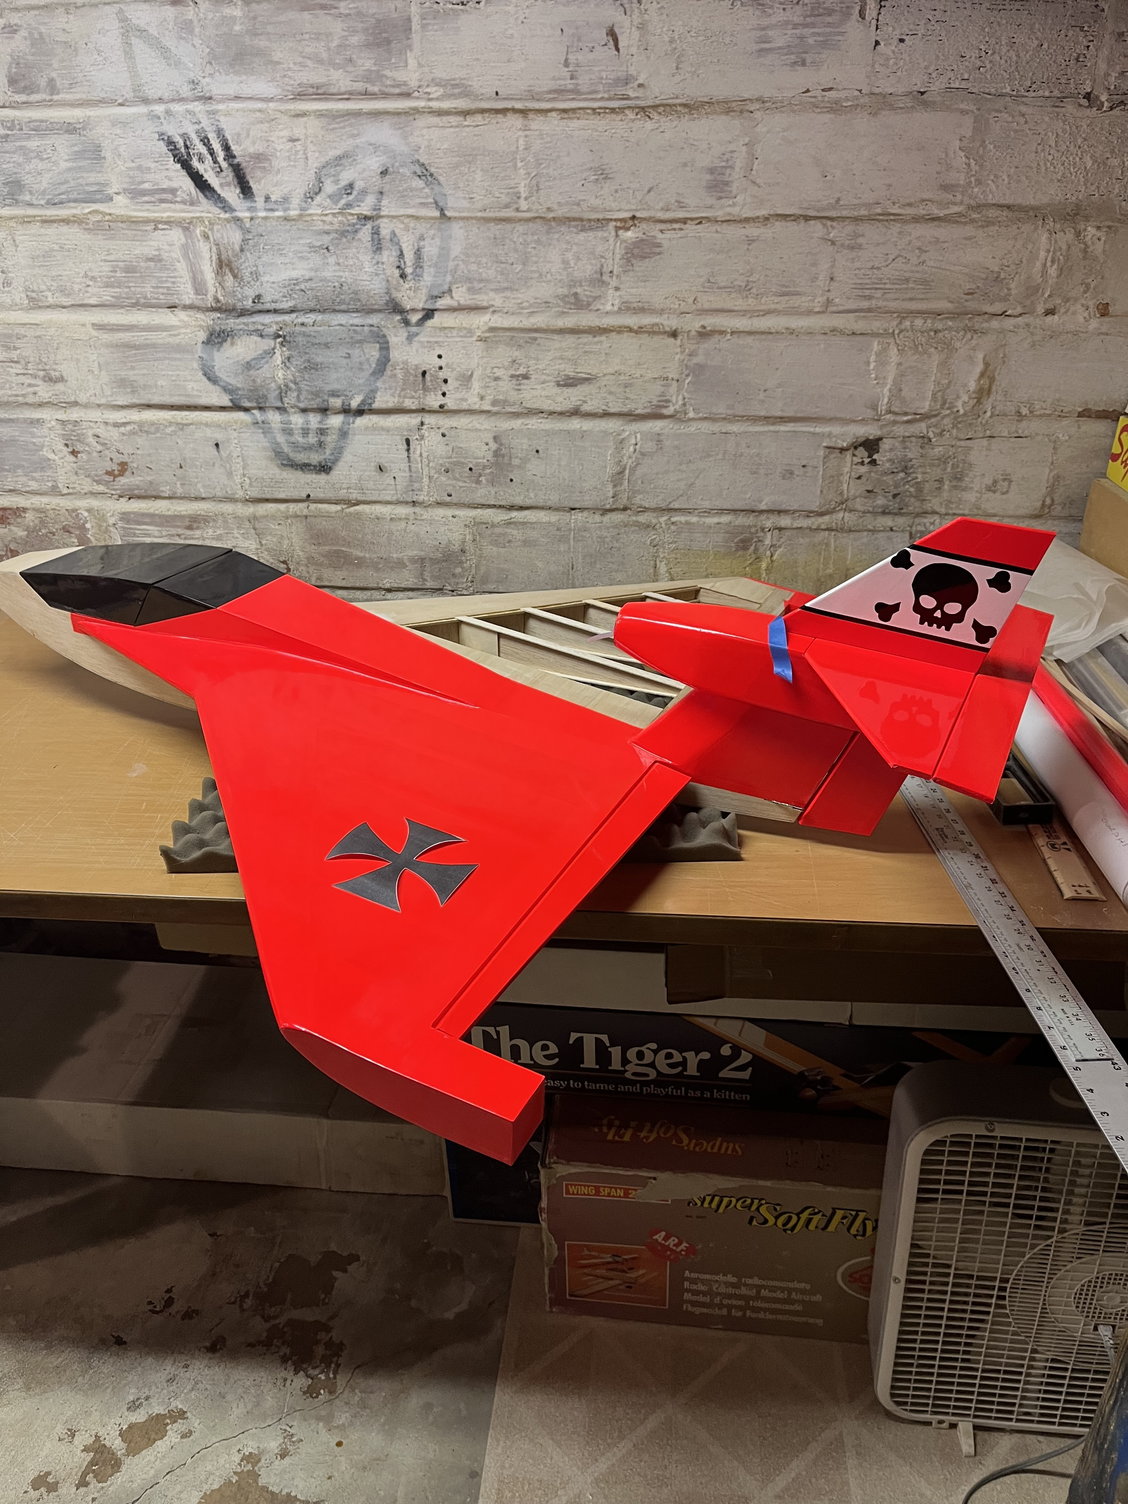
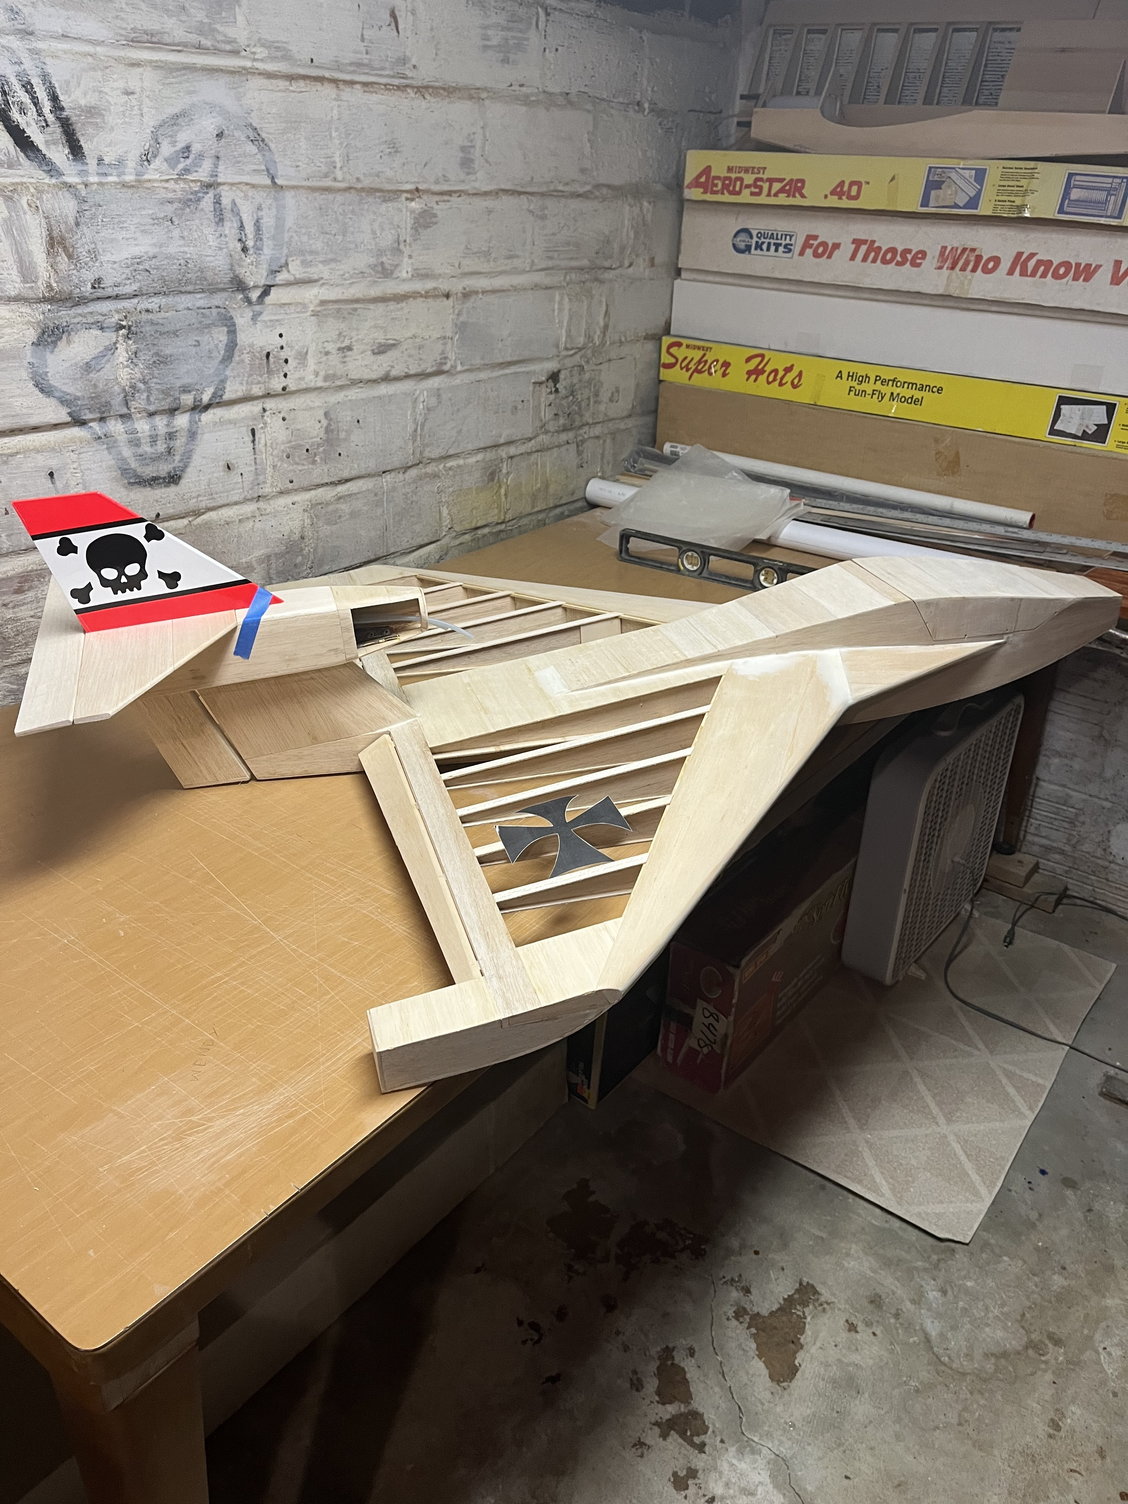
Ok somebody let me know if this sucks……..and if I should rethink it. I have been thinking about doing this ominous German secret weapon concept. Basic yet highly visible with a kinda Red Max vibe to it. Second picture is what I’d like to somewhat end up with………with straighter lines

Last edited by plumberdeluxe; 06-10-2023 at 08:36 AM.
06-10-2023, 09:08 AM
#43
LOL
No color scheme advise from me")
I overdo just about every one of mine - so it seems.
You know, in the end, it's all about what it looks like for you... Your the one that has to watch it while you are flying it.
Now if you were building to sell to the "PUBLIC" what is it that they say? less is more...
Oh, I like that sketch...that is cool...
No color scheme advise from me
I overdo just about every one of mine - so it seems.
You know, in the end, it's all about what it looks like for you... Your the one that has to watch it while you are flying it.
Now if you were building to sell to the "PUBLIC" what is it that they say? less is more...
Oh, I like that sketch...that is cool...